Wabakimi Canoe Trip- From Flindt Landing To Collins: Days 5 & 6 – The Ogoki, Palisade, and Grayson Rivers

Previous Post: Days 3 and 4 – Down The Flindt and Across Wabakimi Lake

Day Five: River Bay To Mouth of the Palisade River 

distance: 24 km. 

We left our River Bay CS after breakfast knowing that we’d be paddling right into some rapids and portages as Wabakimi Lake tumbles down into Kenoji Lake.

The drop from River Bay to Kenoji Lake happens in three stages, three sets of rapids over a 4.5 km. distance.  The three steps take you down – according to

  • our Garmin Topo Canada map set, 8 meters from Wabakimi lake’s 357m to Kenoji’s 349m.
  • The archived NRC topos have a more dramatic figure, a 12-meter drop going from 360+/- to 348+/-.

Having gone through this section of the river twice, we do not recall anything that significant!  Here is a look at the tracking data from this morning – and my attempt at reconstructing what we did. Without notes or images, it is sometimes even difficult to picture the various campsites, let alone particular sets of rapids after you’ve done 43 of them!  We were not taking notes on this trip and the photos are not always on point!

See here for the Topo Canada View.

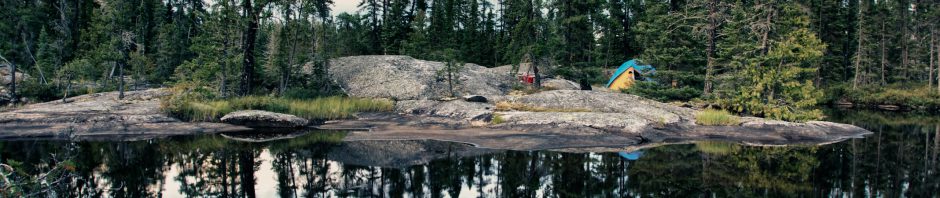
break time on Kenoji Lake – a Clif Bar and some Gatorade while sitting on the south side of the lake after the last set of rapids.

The portages done, we sat on the rocks on the south side of Kenoji for a wee break. We still did not smell any smoke. We decided that instead of redoing the Ogoki River section from Kenoji down to Whitewater Lake, we would stick with a least the main part of our route plan – that is, paddling up the Palisade River to the Slim Lake turn-off.  Then we would go east to Grayson Lake before coming back down to Whitewater via the Grayson River.

As we paddled into the Palisade River, we met our first paddlers in five days at the campsite where they had spent the night.  The day before they had come down the Palisade and said the smoke would quite noticeable if we paddled ten or twelve kilometers further up.  They were now heading south for Lower Wabakimi and Smoothrock Lake.

lunchtime – peanut butter on Wasa bread to go along with the Thai noodle soup and a cup of tea – on the Palisade at the spot  where we would later camp for the night

Within twenty minutes they pushed off for the portages into Wabakimi Lake and we had ourselves a campsite!  We had lunch – the classic peanut butter on Wasa bread with a cup full of Thai noodle soup – while we discussed our options, thanks to the new information we had received.

paddling alongside the wall-like edge of the Palisade River up towards the source of the smoke near Burntrock Lake…definitely worth the effort to see them

After lunch, we decided not to put up the tent just yet and decided to paddle a bit further up the Palisade to get a better handle on the situation.  We also wanted to see what some trip reports described as the gorge-like section of the Palisade up near the turn-off to Slim Lake. Note:

Below is a map indicating not just one but four supposed pictograph sites in that stretch of the Palisade we paddled up and down and back up again the next morning without seeing a thing!  Many rock paintings are so faint and sometimes obscured with lichen that without previous knowledge of their presence they are very easy to miss.

Two years after this trip we found out that there is a pictograph site on that bit of rock behind my brother in the image below!  It is the topmost site on the map above and is at the point where you turn right for Slim Lake and the way to Grayson.

paddling past the stretch of vertical rock  on one side of the Palisade River

definitely smoke in the air near the turn-off from the Palisade River to Slim Lake

smoke is visible at this point on the Palisade- the next morning we would return to this point and turn east (right) into the channel in the middle of the picture

We paddled back down the Palisade towards its mouth and camped that night at the spot vacated by the two paddlers from Toronto we had spoken to earlier. We were definitely in the presence of a bit of history!

Crown Land marker from 1925 at our campsite on the Palisade River

But it was the smoke from Thunder Bay 50 that was most on our minds.  What to do?

early evening smoke while we got supper ready

8:45 p.m. and the smoke seemed to be gone- or helped make dramatic clouds

We had to pick one of these two choices:

  • follow the ranger’s first suggestion and continue down the Ogoki River into Whitewater; we had done that stretch of the river the year before.
  • paddle back up the Palisade River to the Slim Lake turn-off and the route across to Grayson Lake. We would obviously scrap the side trip to Burntrock Lake.

Day Six: The Epic Day – Palisade River to Grayson River near Whitewater Lake

distance: 33 km. 

We were on the water early, figuring to put some distance between us and the smoke in the early morning before things warmed up. By 8:15 we had paddled up the Palisade and turned right into the narrow channel that took us into Slim Lake. So far, so good!  As we left Slim Lake for Scag lake, we dealt easily with the following –

a portage into Scag Lake

Once on Scag Lake, the headwaters of the Grayson River system, we headed over for the lake outlet – aka the start of the Grayson River.  We found a very shallow and almost-not-there river!  We did the carry on river left. the first of the portages – if that is what it was! –  was not even visible. The second one felt more like a trail that someone had once used!

the top of the Grayson River…all it needed was some water!

From Scag Lake To Arril Lake – Grayson River headwaters

As we walked our gear on the top portage we looked over into the bush to the west and saw some smoke.  A very small fire had broken out on the banks of the Grayson, perhaps sparks from Thunder Bay 50. The image below is what we saw.

a small smouldering fire on the west side of the Grayson River as we passed by

We spent an hour and a half dealing with P28 and P29 and stopped for lunch on a point of the south side of the river within ten minutes of having finished them. It was about 3:00 when we pulled into a campsite on the river just before it widens out into Arril Lake.

We had just put up our tent on river right just before the river widens out into Arril Lake. Returning to the shore for the rest of our gear, we saw what you see in the images below.  Yikes!

smoke to the west of Kenoji- afternoon winds whipping up Thunder Bay 50

The first view of big smoke!

As we watched in amazement at the size and ferocity of the smoky spectacle in front of us, we were thinking only one thing – get out of there quick!   This meant crossing Arril Lake and getting into Grayson Lake to the east.  We figured we’d paddle until we got to Whitewater Lake and had put fifteen kilometers between us and the fire.  It was now 3:25 p.m. Here is what motivated us for the next while-

looking back at the fire and smoke from the NE end of Arril Lake

Once we got to the east end of Arril lake we sat on the sand beach for a while and looked west.  The fire was definitely being helped by a strong wind from the northwest as the movement of the smoke shows.

looking back west into the heart of the fire and the visible flames

the scene at the NE end of Arril Lake at 4:00 p.m.

the awe-full beauty of the fire- it was amazing to be there and watch

After maybe forty-five minutes of sitting on the beach and taking in the incredible scene, we left Arril Lake and headed towards the much bigger Grayson Lake.  There is a portage that takes you from one lake to the other at the far east end of Arril.

Arril Lake To Grayson Lake Portage – P30

The winds were still quite strong and were whipping up the fire but it was great to put some distance from it.

looking north towards Arril Lake

An hour and a half later and we were entering the main channel of Lake Grayson. Now, all we had to do was head down the southern channel and we’d feel a lot better. As we started our way down, we watched a helicopter land on the east shore. We pulled in and sat onshore and took in the happenings.

Grayson lake – Rendezvous Point!

looking across Wabakimi's Grayson lake as a helicopter lands

looking across Wabakimi’s Grayson lake as a helicopter lands


helicopter monitoring the fire and putting on perimeter water spraying for a nearby outpost

When the helicopter took off leaving one man still onshore – and waving his arm at us to come over to his side – we hopped back into the canoe and paddled across.  It turned out that he was a Parks Canada official from Saskatchewan who had been assigned to work on this fire because of its size.  He had come in with the helicopter crew who had come to set up a water perimeter system around the outpost property to protect it from the fire.

He also filled us in on what the Parks people thought about the fire. Naïve that we were, it was a bit of a shock to hear that they were just going to let the fire burn itself out.  He told us that this corner of the park actually needed a good fire to get rid of all the deadwood that had been accumulating for years.  And there we had been, looking into the sky for the water bombers!

While all this was going on, we were also treated to a perfectly timed weather event. For the next 35 minutes, there was one hell of a solid downpour that dumped a massive amount of water on the neighbourhood.  Okay, so there would be no water bombers but it was still such a relief to see that water come down and drenching the boreal forest that was being eaten up by Thunder Bay 50. We were soaked but relieved!

We gave the Parks Canada guy our personal info and were reassured to hear that we were headed in the right (i.e. south) direction. The sky was now filled with the smoke of the doused fires.

Lake Grayson after the 30-minute downpour put a damper on the fire!

It was like a fog had settled down on the area but it did make for some dramatic photos.

Down we went to the south end of Grayson Lake and a few portages to put even more water and distance between us and TB50!

The epic day was almost done.  We had started at about 6:45 from the bottom of the Palisade River and now we were leaving Grayson Lake for the last 7-km. stretch of the Grayson River before you hit Whitewater Lake.

Last Grayson River Portages before Whitewater Lake

We hit the portage trail and walked through this: it felt like we were in a scene from the Lord of the Rings movies – there was something eerie about being there.  It was also getting late and we had been on the move for almost fourteen hours.

smoke hung in the air as we walked this portage trail

There had probably been a lightning strike within the past couple of hours.

signs of a recently doused fire were all around us

One more impossible-to-find portage trail – that would be P32 on the map above! In the end, we just bushwhacked our way to the other side. Thankfully, it was not very far – and then we headed for the tent site indicated on the Wabakimi Project map.

We were so beat that we didn’t even bother with supper that night.

Max paddling into a bay where I think there is a portage trail- I may have been wrong! We bushwhacked.

Next Post: Days 7 and 8 – Down Whitewater Lake to The Ogoki Lodge, the Beckwith Cabins, and Best Island’s South Beach

Posted in Wabakimi, wilderness canoe tripping | Tagged , , , , , , , , , , | Leave a comment

Wabakimi Canoe Trip- From Flindt Landing: Days 3 and 4 – The Flindt and Ogoki Rivers

Previous Post: Days 1 and 2 – From Flindt Landing Down the Flindt River

Day Three: Flindt River to Wabakimi Lake

distance: 20 km. 

This day was one of those when we decided to put in some kilometers on the water before having breakfast.  We set off at 8:00, dealing immediately with the two sets of rapids just below the campsite.  We ended up lining the canoe through both; the water was not quite high enough to be able to run.  We stopped about 45 minutes later on a small island and took out the breakfast bag and spent an hour enjoying our coffee in the morning sun.

On the map below, our campsite is in the center of the page; the red pins show that there were a few sets of rapids to deal with before we got to Tew Lake and Wabakimi Lake.


After our island breakfast stop, we headed on to the next series – P13,P14, and P15. We ran and lined P13, lined P14 on the left side of the island, and then lined/ran P15. In all, we spent about an hour dealing with all three.  There was more to come!

It would take us an hour and a quarter to deal with the next three sets of rapids.  We portaged P16 – no fuss there!  Then we lined & ran through P17 on river right.  After taking a quick look, we also floated past P18.  We were now in Tew Lake, a part of the Ogoki River System. Bye, bye, Flindt!. About a half-hour later we pulled ashore on river right. It was almost 2:00 and definitely time for lunch!

Max reading the ripples while the canoe sits in a cove behind him

Lunch over, we headed for the east end of Tew Lake.  Our maps showed one last bit of work for the day.  The three red pins on the overview map below set the stage!

Day 3 P19 to D3 CS – West end of Wabakimi Lake


One thing that happens as you spend more time on the river is that all the basic routines become more and more efficient and everybody knows exactly what it is that they should be doing. Our portage routine was coming along nicely, thanks to the Flindt.  We would knock off the next three carries – the first two were admittedly fairly short – in a bit more than an hour.

Flindt – P20, 21, 22 Satellite View

We were now in Wabakimi Lake, the lake at the center of Wabakimi Provincial Park. (See the map for Day 4 below.) It is 16 kilometers long from west to east but the west half is fairly narrow; it does widen out on the eastern half. We found a decent campsite on a point on the south shore not too far from where we had come into the lake. Up went the tent and the tarp; Day 3 was in the books!

our canoe with Wabakimi Lake and the northern shore in the background

our Day Three campsite on the south side of Wabakimi Lake – see map above for exact location!

dusk view of a small bay from our campsite

Day Four: WabakimiLake (W end) To Ogoki River Bay

distance: 23 km. 

Lake Wabakimi on a windy day can be a bit of struggle – and that is what we had a bit of on this day.  We started off at 8:00, hoping to benefit from the calmer conditions one finds earlier in the morning. Easy paddling east down the narrow section of the lake with a light SE wind that picked up as the day progressed.

By 9:00 we were on the north side of the lake and heading for the string of islands off the northern shore, making use of them as windscreens as we made our way east. 11:15 found us at the east end of those islands and heading into some choppy water towards River Bay and the outpost.

break time on the north shore of Wabakimi lake as we paddled through the maze of islands, using them as windscreens!

Max getting a handle on the best route through the tangle of islands on the north side of Wabakimi Lake as we deal with the impact of strong winds

a very scenic stretch of Wabakimi Lake on the north shore

We did paddle up to the outpost to get the shot you see below; there was nobody home.  We had hoped to get some news on the wildfire situation that had started about ten days before. After some deliberation and the advice of the park superintendent and other paddlers, we had decided to go ahead with the trip.  So far we had not smelled any smoke or even thought of the fire that much. That would be changing in the next day!

a fishing lodge at the east end of Wabakimi Lake just as you enter Ogoki River Bay- nobody home!

Shortly after we paddled back out into the bay, we spotted a Wabakimi Parks bush plane. It landed in front of us and we paddled over.  The ranger was checking fishing permits!  He asked us for our camping permit.  As luck would have it, it was tucked deep inside our one super-waterproof bag – the one with our sleeping bags and other need-to-keep-100%-dry stuff.  Digging it out of the bag while bobbing on the choppy water of River Bay was not going to happen. So – I gave the guy our names and addresses and told him to check with the park super since I had gotten and paid for the permits from him over the telephone.

We also asked him about the fire situation.  He said the fire, labelled Thunder Bay 50,  was currently  around the Burntrock Lake area, about 20 kilometers from River Bay.)

He made two route suggestions:

  1. paddle down the Ogoki River into Whitewater lake
  2. paddle/portage back to Wabakimi Lake and go into Lower Wabakimi Lake

As our map for Day 4 shows, we kept on going to the east end of River Bay before stopping for the day and putting up our MEC Wanderer 4 tent.  Still not decided was what to do the next day.  The original plan had been to paddle into Burntrock Lake and spend a couple of nights there before turning back to Slim Lake and Grayson Lake.  The developing fire had obviously changed things!

our humble campsite on the south side of River Bay- see the map above for exact location

We were struck by the amount of deadwood and blowdown behind our tent site on the south side of River Bay.  It had not yet occurred to us that the parks people might be happy with a burn in the area!

the bush behind our tent – lots of deadwood ripe for burning

It is almost 9 p.m. as we gaze westward towards the soon-to-be setting sun.

Next Post: Days 5 and 6 – Up The Palisade River and Down The Grayson

Posted in Wabakimi, wilderness canoe tripping | Tagged , , , , , | Leave a comment

Wabakimi Canoe Trip- From Flindt Landing To Collins Via The Flindt,: Days 1 & 2 – Flindt River

Previous Post:  Wabakimi Canoe Trip – From Flindt landing To Collins – Intro, Logistics, Maps

Day One: Flindt Landing To Flet Lake

distance: 25 km. 

Flindt Landing and the CN rail tracks cross Heathcote Lake about three kilometers from its south end.   Its 16 kilometers length makes it the main wider section of the Flindt River system.  The Flindt’s actual headwaters is Vanessa Lake,  another thirty-five kilometers further south of Heathcote.  [See here for an overview map.] We would spend the first three days paddling down the Flindt River system to where it merges with the Ogoki River below Tew Lake.

We started a bit late on our first day out, still tired from that 27-hour train ride!  Nice sunny weather and no wind made for a gentle introduction.  Within three hours we were 16.5 km. downriver.  We would stop for a leisurely lunch on the far side of P01. Including the short carry, we spent an hour and a half there, enjoying the shade and very fact that we were finally in trip mode.

Flindt P01, P02, P03

We portage when we have to, run or line & run when we can, always making sure to check things out beforehand.  Sometimes the carry is actually more efficient than an attempt at lining the canoe down a difficult stretch of river.

P02 was one of those we lined and ran without difficulty.  P03 was a quick carry and we were back to cruising speed.

our canoe waits while we scout some rapids on the first day out.

my brother Max double-bagging it on the portage trail

Flindt – P04, 05, and Day 1 CS

P04 was a portage that took us about a half-hour; we lined and ran through P05 in about ten minutes.  Then it was time to look for a campsite, given that it was already 6:20. (We had moved the hour hand back by one when we entered the Central Time zone somewhere near Collins on the train in.)  We found our spot in the small bay on the west side of Flet Lake indicated above; we were done for the day.

Late-ish start and late-ish finish to Day 1 but it felt great to be back in Wabakimi!

rockin’ reflections in the mid-afternoon

the east side of Flet Lake at 8:00 p.m. from our campsite

Day Two: Flet Lake To NE Corner of Big Island on the Flindt River

distance: 26 km. 

we got to share our portage trail with this local.

P06 RR 110m – a 35-minute hauling job

We did a bit of this during the trip- here is Step one! The new L.L. Beans boots passed the test as we lined our canoe.

It is great when there is somewhere to walk on the side of the river!

Almost through – although I need to pay more attention to my rope!

This morning we lined through P07 in ten minutes and did the same with the next set of rapids. When we came to the rapids indicated by P09 we did a carry.  P1o we paddled right through.


a portage trail that had that Lord of the Rings look about it

We did waste some time this day! When we got to the south end of Big Island, we took the left-hand turn and paddled up for about forty minutes. Not having a complete map view of the island,  we thought we had paddled into a long narrow bay! Back we went to the bottom of what we only later realized was an island.  Back home in Toronto my wife just happened to be monitoring our progress at this time and having a WTF moment as she tried to figure out what was going on!

our Wanderer 4 tent in the background and our Woods Pack replacement, the Hooligan, in the foreground

We paddled down the right-hand side of Big Island to a decent campsite just above a set of rapids. It was 6 p.m.

our front yard at the end of Day Two on the Flindt River

Next Post: Days 3 and 4 – Down The Flindt and Ogoki Rivers Into Wabakimi Lake

Posted in Wabakimi, wilderness canoe tripping | Tagged , , , , | 5 Comments

Wabakimi Canoe Trip- From Flindt Landing To Collins Via The Flindt, Ogoki, Palisade, Grayson, and Boiling Sand Rivers – Intro, Logistics, Maps

Table of Contents: 

Introduction

Our Flindt To Collins Itinerary

Maps and Related Resources 

The Ride There and Back – The Train From Toronto

Put-in at Flindt Landing – VIA Stop and  Lodge on Heathcote Lake

Day-by-day posts – detailed maps, rapids, portage info, campsites

———————————————–

Introduction:

Wabakimi Provincial Park in NW Ontario is an obvious choice if you want to get away from the crowds.  For every hundred paddlers churning up the waters of Algonquin, Killarney, or Quetico, there are maybe one or two in Wabakimi. But for us, there is a price to pay- and that is the time needed to get there.  We live in southern Ontario (London and Toronto), so Armstrong Station is a long way; if you live in Wisconsin, Minnesota or Thunder Bay, the park is almost on your doorstep!

Look at the Google map below to see where Wabakimi Provincial Park is in the bigger picture.

Our 2010 visit to Wabakimi Provincial Park gave us every reason to go back for more, and that is what we did the next year.  (Check out our trip report “Discovering Wabakimi: Paddling to the Center of the Universe for more info.)

———————————————–

Our Flindt to Collins Itinerary:

Flindt Landing – Flindt River – Wabakimi Lake – Kenoji Lake – Palisade River – Grayson Lake – Whitewater Lake – Smoothwater Lake – Boiling Sand River – Collins

  • July 23 – we left Toronto Union Station at about 10 p.m. (Note: In 2019, the schedule was changed: the train now leaves at 9:30 a.m. twice a week.
  • July 24 – spent all day on the Via Canadian train and got to Flindt Landing around midnight (Since 2019, it arrives around 10 a.m.)

heading for the portage trail at dusk on the Grayson River

  • Day 1 – 25 km – from Flint Landing cabin to campsite on a bay off Flet  Lake
  • Day 2 – 26 km – from Flet Lake to campsite on Flindt River by portage on NE end of Big Island
  • Day 3 – 20 km – from lower Flindt River camp to Wabakimi Lake west end
  • Day 4 – 23 km – to River Bay South shore after an encounter with a park ranger
  • Day 5 – 24 km – to the start of Palisade R. after paddling up to turn-off to Slim Lake and back (9 km)
  • Day 6 – 33 km – to a campsite on Grayson River before Whitewater Lake
  • Day 7 – 9 km – a small island at the top of Whitewater just to the west of Porter Island
  • Day 8 – 22 km – to a sand fly-infested beach on the south end of Best Island on Whitewater Lake –
  • Day 9 – 22 km – halfway down Lonebreast Bay to Bussey Island campsite (one with memorial)
  • Day 10 – 11 km – to the island at the north end of Smooth Rock Lake
  • Day 11 – 25 km – to campsite down near the south end of the west arm of Smoothrock Lake
  • Day 12 – 19 km – to Boiling Sand River campsite across from Mattice Outfitters Lodge
  • Day 13 – 8 km – to Boiling Sand River  after Gnome Lake
  • Day 14 – 3 km – to Bath Lake just before the portage over the railway tracks
  • Day 15 – 5 km to Collins and board the east-bound VIA Canadian train at 8:50 a.m. CT

Aug 09 – the Via train arrived at Toronto’s Union Station at about 10:00 a.m.

———————————————–

Maps And Related Resources:

Federal Government 1:50,000 Topographic Maps

Natural Resources Canada

The Federal Government 1:50000 topos provide greater detail and more context of the route to go along with the Wabakimi Project maps.  You can find the topos you need at the Federal Government’s Natural Resources Canada website and print them out yourself.

Clicking here will take you to the 052  folder, where you will find the following 1:50,000 topos in either the J or the I subfolders.  Each map folder contains three choices; I download the prt.tif file. Do note that a few of these maps are in black and white.

The maps below are the ones you’ll need –

  1. Seseganaga Lake 052 J 01
  2. Wilkie Lake  052 J 08
  3. Neverfreeze Lake 052 J 09
  4. Wabakimi Lake 052 I 12
  5. Burntrock Lake 052 I 13
  6. Grayson Lake 052 I 14
  7. Goldsborough Lake 052 I 11
  8. Onamakawash Lake 052 I 05
  9. Armstrong 052 I 06

——————-

David Crawshay’s Topo Canada App for iOS

David Crawshay’s Topo Canada iOS App for iPhone enables you to download all of the above to your iPhone. While leaving the iPhone on all day to use as your primary GPS device would eat up battery power like crazy, it is very useful to make a quick confirmation that you are indeed where you think you are! Download Crawshay’s app here.

——————-

Toporama Canada Online Map:

Toporama is NRC’s modern version of the archived topo sheets.  It is essentially a seamless map of the entire country and allows you to extract from and apply all sorts of additional information and features to the map. Click here to access.

——————-

None of the above provides detailed information about rapids, portages, and campsites. For that, you will need to turn to sources like the Friends of Wabakimi.

Wabakimi Project Maps

volume-three_v1To get a handle on possible routes, campsites, and portages, we purchased Volume 3 of the Friends of Wabakimi (formerly Wabakimi Project)  Canoe Route Maps series.

We already had Volume 1 from the previous summer’s Wabakimi trip and had found those maps quite useful.  The $40 for the Wabakimi Project maps is an investment, not a splurge – but see the Paddle Planner link below for a free version!

It will get you the campsite and portage information you need;  it will also help this volunteer organization to pay for the cost of flying in people who give a week or two of their time in the summer to clear and mark the portages, create the campsites, and do the mapping work that makes the route maps possible.

——————-

Paddle Planner

Click on the header above to access the site.

In the decade since this report was written, a new source of canoe route info has appeared on the internet. Its creators have collated all the available information from the sources above – and from yet other trip reports and info submitted to them by fellow trippers.

It is the same approach used by the now-defunct Jeff’s Maps and the current Unlostify maps available for some Ontario destinations. Of the data, the Paddle Planner website includes this reminder:

Wabakimi is a real wilderness area and has the challenges that wilderness brings. Portages and campsites are not as well-maintained as in other canoeing areas such as the Boundary Waters. A route may not have been traveled for years, so portages and campsites may be overgrown, hard to find, and/or may not exist anymore. All locations are approximated.

Access the site here.

Note: there is a $20. cost to access all of the useful features of the site, a minor investment that will repay itself by having mostly reliable info on what is coming up in terms of rapids, portages, and campsites. Given the nature of Wabakimi, we have found that some of the very low-level usage portages indicated no longer exist.

——————-

Ontario MNRF:

Ontario MNR map website

As well, the Ontario Government’s Ministry of Natural Resources and Forests has its own online map service (see here), which often provides more up-to-date and detailed maps than the Federal Government’s maps listed above.  It is worth looking at them – and even printing out certain sections. If you go into Map Layers, you can access their satellite imagery, which is often better than the one in Google Earth.

——————-

Google Earth – Satellite View:

The Google Earth satellite view provides revealing views of the route, and it is worth spending a bit of time getting the satellite perspective.  A web version can now be accessed within the Chrome browser.

Click here for the KML file (163 kb) of the every-ten-minutes-while-it-was-on tracks recorded by our Spot Connect during our two-week trip. Import the file into Chrome’s web-based Google Earth app as a New Project, and you should see all 730 tracks. All that is missing is the first three hours’ worth – we were still learning how to use the device!

Garmin Etrex:

Finally, we had a Garmin GPS unit (an Etrex) along for the ride as backup and occasional solution to those head-scratching “where-the-heck-are-we?” moments!  We also used it to record our daily track and features like potential campsites, outposts, and rapids.

Given all the digital and paper map resources mentioned above, a smartphone would be all you need for the occasional GPS location reading.

——————-

The Spot Connect:

If you want to see the SPOT Connect waypoints of our trip, click here to download the 266k file.   You can import the file into Google Chrome’s web version of Google Earth and see the GPS trail that the SPOT recorded.

iPhone and SPOT Connect

I am really glad we brought the Spot along.  It provided the folks at home with real-time info on our location, and the email messaging option came in handy for sending brief “all okay” or more personalized notes back home at the end of each day (45 characters max).  It does this by pairing up with your smartphone (I use my iPhone).

The Spot also provides excellent post-trip data, in particular, the amount of time we spent in certain spots along the way. It records a track every ten minutes, so if there is a one-kilometer distance between two successive tracks, you will know we were motoring. If you see progress in meters, it will mean some serious lining or portage is in progress!

Update: The Spot Connect was discontinued in 2017.  While ours had served us well, we ended up getting a Garmin inReach Explorer+ in 2018 because of its two-way communication feature. You can receive emails and daily weather updates on the inReach and do all the usual tracking and emergency contact stuff. It even has a basic mapping window.

———————————————–

The Ride There:  A Day On The Rails!

Hornepayne, Ontario VIA stop

VIA runs Canada’s passenger train service on lines it rents its presence on the tracks from Canadian National Railways (CN for short).  The train is a great way to get to Wabakimi from southern Ontario if you are okay with the following:

  • the loss of flexibility with respect to the exact day when your trip ends
  • the good chance that the train will be quite late on arrival and return thanks to the fact that CN’s freight service takes precedence over VIA’s passenger service!

VIA’s The Canadian runs from Toronto to Vancouver two or three times a week. It is a 4 day 4500-km. epic train ride; the section to Wabakimi is about one-quarter of that. We left Toronto’s Union Station at 10:30 p.m. on a Saturday; we got to Flindt Landing around midnight, a bit more than a day later! Given VIA trains’ poor on-time performance since the mid-2010s, we were lucky to have arrived almost on time!

the view from the outside of the train at Hornepayne

VIA Schedule Westbound From Toronto:

the dome car- a great place to take in the passing Canadian Shield scenery

Stuff being unloaded from the baggage car at Armstrong Station- about two hours east of our exit at Flindt Landing.

____________________________

Catching The Train Back To Toronto:

The logistics were also a bit different at the other end of the trip.  Instead of ending the trip at Little Caribou Road, about 6 km from Armstrong, we paddled to Collins at the north end of Collins Lake on the last morning. We were at the railway tracks, which pass through the non-reserve status Ojibwa settlement of perhaps 200 people by 8:30 a.m., waiting for the train’s 9:30 arrival.

The VIA stop at Collins

the eastbound VIA- just a little bit late!

We had arranged for the eastbound VIA train to pick us up on a Monday (August 8).  (There are three eastbound trains passing through the Wabakimi area each week- Monday, Wednesday, and Friday.) [See the new schedule below!]  Everything worked out just the way it was supposed to!  Within thirty minutes of boarding, we were in the dining car having breakfast other than oatmeal for the first time in over two weeks. We were on our way home- and a day later, we would be!

VIA Schedule Eastbound From Savant Lake:

———————————————–

Flindt Landing – VIA Stop and Lodge

We got off the train at Flindt Landing around midnight. The lodge owner was up but was not expecting us.   A confirmation call by me a day or two before would have been a good idea!  Someone cleared the cabin on the island quickly, and we had our home for the night.

At $80. – or was that $100.? – it was a bit steep for the ten hours we were there.  However, the alternative – looking for a place to pitch our tent at midnight, either near the lodge or on the other side of the lake – was worse, especially since we had no information on actual camp spots that we could use.

Note: With the revised VIA schedule, you now arrive at Flindt Landing from the east in the morning (9:42), so the problem of accommodation is solved. You can paddle until you find a decent spot on Heathcote Lake. (See here for the new schedule.)

flindt-landingvia-railcn-tracks

A satellite view of Flindt landing and the Lodge on the north side of the tracks. The guest cabins are on the small island and are accessed by a wooden bridge.

———————————————–

Posted in Wabakimi, wilderness canoe tripping | Tagged , , , , | 5 Comments

Canoeing The French River From Top To Bottom: Days 10 & 11 – From Georgian Bay To Hartley Bay Marina

Last revised: September 22, 2021.

Table of Contents:

Day 10 – Up To Robinson’s Bay= Basic Data and Overview Map

Day 11 –  Back To Hartley Bay – Overview Map and basic data

Links To Other French River Trip Reports

————–

Day 10 – Up To Robinson’s Bay= Basic Data and Overview Map

  • distance: 20.6 km
  • time: 8:20 a.m. to 3:20 p.m.
  • portages/rapids/lining: 1/0/1: 
    • 75m – very fast water; lined on high ridge river right; tree dancing (passing the painter around obstructions and trying not to slip down the slope).  The 25ft line was ‘just’ enough
    • 75m – across the island river right of Mill’s Falls
  • weather: a mix of cloud and sun all day
  • campsite: CS690 (old #707) w/TB – on Robinson’s Bay (across from the only cottage on the bay!); 1 x 4 person plus room for 1 or 2 2-person tents; nice elevated veranda view to, yes, the cottage; aged bear scat visible on the trail to the box toilet
  • GPS tracks – 2019 French River (3.2Mb Dropbox file)

Day 10 – From Georgian Bay To Robinson’s Bay (CS 707)

————–

Alternative Exit From the French R. Delta

It was Day 10 of our 11-day French River Descent and Delta Ramble and we were on our way back to Hartley Bay and our vehicle.  Another time and a few more days and we might have considered the following alternative:

Along The Georgian Bay Coast Or Along Collins Inlet To Chikanishing Creek

From our CS838 (old #822) at the western end of French River Provincial Park, it is only a 5-kilometer paddle to Grondine Point. Another 5 km. and there you are at the east end of the collection of islands called The Chickens with a couple of possibilities –

  1. If Georgian Bay is calm, you can paddle along the south coast of Philip Edward Island all the way to South Point.  Campsites are plentiful and the “eye candy” scenery level is dialled up to 11.
  2. if the wind is an issue, you can paddle up Beaverstone Bay and then head west along the sheltered Collins Inlet on the north side of the island. You’ll be doing something the voyageurs themselves did in their canots du Maitre laden with trade goods if the Bay water was too rough.  Campsites are more scarce and it is a quieter and not quite so scenic experience compared to the one on the south side of P.E.I.,  but it does have its own charms. There is also a pictograph site you can check out as you head west from Mill Lake.
  3. The take-out spot is at the Chikanishing Creek parking lot. It is a one-kilometer paddle up the creek from the bay. An arrangement would have to be made for your vehicle to be waiting for you there.

See the following post for more map and campsite info, as well as pix –

Kayaking the Georgian Bay Coast: Logistics and Days  1 and 2- Chikanishing Creek To Solomon Island to Grondine Point

The Georgian Bay Coast from the west end of FRPP to Chikanishing Creek

  1. [You can download the Natural Resources Canada topo map sheet 041 H 14 Collins Inlet here.]

For more info on the Philip Edward Island area, our two posts below will help you get your own trip started –

Paddling Around Georgian Bay’s Philip Edward Island – Part One

Paddling Around Georgian Bay’s Philip Edward Island – Part Two

————–

Up Batt Bay To Black Bay

CS822 French River Provincial Park – room for many tents

Mulling over our return route via the Voyageur Channel to Hartley Bay the night before when I should have been sleeping, I factored in the high water level and the faster-than-usual current we had faced coming up the Lily Chutes channel.  I worried about what the Voyageur Channel would be like, given the narrowness of the sections where the rapids were.  We would find out soon enough!

CS 822 – looking south towards the open Georgian Bay

We set off for Black Bay, paddling up the west side of Batt Bay. Just north of 838, there is evidence of a recent small fire that has burned trees along a 100-meter strip of the coast.

recent fire damage on the west side of Batt Bay between CS 837 and 836

a Group of Seven moment as we paddle up Batt Bay to Black Bay

Group of Seven moments…same, same – but different

————–

Checking Out The Voyageur Stopping Place

At the top of Batt Bay and the west end of the Voyageur Channel is a site identified by Eric Morse and Toni Harting as a favourite stopping place of the fur trade brigades after their descent of the French River from Lake Nipissing.

Morse writes in Fur Trade Routes of Canada/Then and Now:

They usually did the French River in one long day and then met at this spot – called  La Prairie des Francais – before continuing on to Georgian Bay and the journey along the Lake Huron coast to Sault Ste. Marie and beyond.

La Prairie at the top of Batt Bay in the French River Delta

We’ve paddled by La Prairie a few times in the past without knowing anything about its significance.  Toni Harting’s book – undoubtedly drawing on the earlier Eric Morse work – first alerted us to the location’s history. This is but one example of how his essential book on the French opens up an extra dimension to any French River canoe trip.

La Prairie – a voyageur fur brigade resting stop at the bottom of the French River

We spent fifteen minutes at the site, taking in the views and snapping a few photos. Max would eventually get to the patch of devil’s paintbrush you see in the panorama of the site below.

a view of La Prairie from the north

————–

A New “Cottage” in FRPP!

As we paddled up the tail end of the Voyageur Channel, we passed by a building that may not have been there in 2017, at least not in its present form. We were somewhat surprised to see new construction underway in a provincial park, but there’s undoubtedly some loophole that makes it okay.  In this case, the smaller cottage to the right may have been there already, though it appears to be in the same stage of construction as the palace. It could be the boathouse!

a new cottage at the top of Batt Bay in the French River delta

close up of new cottage on Batt Bay French River

————–

A Morning of Mis-Takes!

On we went to Black Bay.  First, we were going to get some pix of the so-called Fort on the NE tip of the island we had paddled by the afternoon before (the green track). [See the previous post for details about the “Fort”.]  Well, astoundingly, we missed it!

Max’s eTrex 20 has such a tiny screen that it doesn’t always provide enough context. This can be a problem in the maze of channels and islands that is the Georgian Bay coast! He may not have been paying full attention either, and was not exactly sure where The Fort was.  How else to explain the 90º turn to the south at the west end of Fort Island?  Yikes! And the guy in the bow watching the shoreline zip by? Also clueless! In retrospect, we should have “waypointed” the spot before we set off from 838!

Fort Island – Voyageur Channel French River

And that is how we missed getting some shots of the jumble of rocks named The Fort!  I kept scanning the terrain to my right thinking we’d pass it soon. In the meanwhile, when we passed it, it was on the left! See here for the only possible reaction!

————–

Up The Voyageur Channel- And Back Down

On maps, the Voyageur Channel looks tempting as a possible canoe route as it is shorter than the others. However, this channel is very hard to access at low water levels, especially using large canoes. It seems, therefore, somewhat out of place to call this the Voyageur Channel since it is unlikely that fur-trade freight canoes would have used this channel on a regular basis given the great difficluties that would have been encountered. [Toni Harting, 32]

Off to the questionable call of the morning!  We paddled up to the top of Black Bay and what we remembered as one easy lining job at the Washer Woman and one messy portage at the top of the Voyageur Channel.  We had gone up the channel in September of 2017; here is the topo that shows what we dealt with on that occasion –

Sept 2017 Going up the French River’s Voyageur Channel

What we found this year did not fit at all what we remembered!  Clearly, the higher water levels had created something very different.  A comment in Toni Harting’s book on the French River makes this point –

At high river water level the Washer Woman shows a considerable hydraulic step that can be difficult to negotiate when travelling upstream. If the Georgian Bay level is very high its water can go up into Heron Bay and fill the Voyageur Channel, making this channel navigatable even if the river water level is very low.[Harting, 32]

Unlike 2017, this June we were facing the first situation – high river water levels.  Forget the notion of tracking our canoe up – it would require a portage on the channel left to get above the Washer Woman. After we paddled into the bay, Max waited while I looked around for a portage trail.  There were no markers to indicate one and I bushwhacked my way to the top of the rapids. That is where I met the party of three canoes just pulling into to the top of the portage. They noted that it would be a real challenge to get further up given the strong current.  My thoughts of the previous evening about the problems with high water levels coming down the narrow channel at the top seemed to be confirmed.

As I walked back to Max sitting in the log-jammed bay, the thought of doing the Washer Woman portage just to return after being unable to get to a take-out for the messy portage at the top of the Channel had me decide to just turn back and go up by another of the many channels in the Western Outlet. We’ll never know what it really would have been like…

————–

To Shannon Bay & Up The Mills Channel

Instead, we paddled back down Black Bay, rounded the corner, and entered the west cross-channel that goes all the way to Devil’s Door Rapids.  We had done the short portage around Devil’s Door a couple of days before; we would not be going that far on this day.

As the map below shows, we passed by the south end of the Old Voyageur Channel and then headed up another channel- Toni Harting has its name as Mills Channel –  that connects with the Old Voyageur Channel at the north end.

When we got to the top of Shannon Bay, we entered the channel. It was quite narrow at first and when the paddling against the current became too much, we tracked the canoe about 75 meters.

Scampering on channel right on the top of the rock ridge that lines the channel, we had a few awkward moments thanks to our barely-long-enough-for-this-job 25′ (7.6 m) lining ropes and badly-placed tree growth on the rock face!  This was one of those occasions when 50′ (15 m) would have been nice!  In ten minutes we were at the top of the swifts and paddling north to the next challenge.

old Voyageur Channel and Mills Channel immediately  to the east

Down below is a more detailed satellite view of the area from Boston Falls down to the unnamed falls (let’s call it Mills Falls after the channel the water dumps into!) that we paddled by.

We entered a small bay to the north of Mills Falls and I took a walk up towards  Boston Falls. While there may be an actual portage trail, I did not see it.  We could have bushwhacked it but it would have been ugly.  Toni Harting’s comment in his book on the French explains why!  He writes- “Boston Falls narrow and difficult portage on the west shore.” We were on the east side of Boston Falls!

rapids/falls  coming into Mills Channel  from the left; Boston Falls up to the right

It turned out to be a good thing that we were!  A couple of minutes of looking around led us to a much shorter and easier carry to the top side of the Mills Falls.  The satellite image below shows roughly what we ended up doing.

Satellite view of Boston Falls and Unnamed Falls

Here is a view from the north side of Mills Falls looking south down Mills Channel.

looking down Mills Channel from above Mills rapids/falls

————–

Up Robinson’s Bay To Our Campsite (690)

After a lunch break at the end of our 50-meter portage, we continued north.  Swifts at the top end of the Old Voyageur Channel meant a couple of two-minute sessions of vigorous paddling – and then it was an easy paddle up the Western Channel.  On some maps, this stretch is labelled Robinson Bay.

Cottages on Robinson’s Bay and designated campsites – Note: the CS numbers are the old ones – see here for the list of  CS numbers as of 2021.

It was a late- afternoon when we pulled into the bay where CS690 (old #707) is located.  We found a nice spot amidst a stand of oak trees for our four-person tent.  Last fall’s leaves covered the ground and it looked like we were the first campers of the year to have stopped there.

our tent at CS707 in the middle of a stand of oak trees

Across Robinson’s Bay from the campsite is a cottage.  Had it been a Thursday we would not have expected the arrival of what looked like a father/son combo at about 7:30. Their weekend at the cottage was about to begin.  We had somehow picked the campsite on Robinson’s Bay closest to a cottage. The fact that it was a Friday made it that much more likely that the owers would be motoring in for a weekend stay.

It did not take too long for them to get that water generator going and the sound of the motor filled the neighbourhood. Thankfully they put the thing off some time after 9 p.m. and things quietened down again!

CS690 (oldCS707) on Robinson’s Bay above the Old Voyageur Channel

————–

Day 11 –  Back To Hartley Bay

  • distance: 19.5 km
  • time: 8:45 a.m. to 12:25 p.m.
  • portages/rapids/lining: 0/0/0: 
  • weather: cloudy; light rain; rain; cloudy
  • campsite: home, sweet home!
  • GPS tracks – 2019 French River (3.2Mb Dropbox file)

Day 11 route – back to Hartley Bay

————–

The Rain Impacts On Our Plans

Luckily, the rain did not start until we had packed away the tent and put all of our essential gear into the dry bag.  We set up one of our 2.5m x 3.5m silnylon tarps to cover our breakfast table and seating area.

watching the rainfall at CS 707

We were still undecided about what we would be paddling this day. We had two options –

  • head east to our favourite French River Park campsite at 633, put up the tent, and then go over to the Pickerel River to check out the fire damage
  • end the trip this day with an indirect route to our vehicle at Hartley Bay

The weather would help us decide!  The morning would be wet, with intermittent drizzle and coolish temperatures.  The weather forecast I accessed on my Garmin inReach called for more rain overnight.  Spending it in our tent on the scenic but exposed campsite on Pickerel Bay did not make much sense.

departure time from campsite 690– Robinson’s Bay

————–

Checking Out CS688 (old 706)

We paddled up the top end of Robinson’s Bay, stopping to take a quick look at campsite 688 (old 706) on Crombie Point. We agreed that had we known what it looked like we would have kept on paddling for a few more minutes the day before! See below for a shot looking towards the sheltered site.

a view of Campsite 688  at Crombie Bay Point on the French River’s Western Channel

————–

A Detour Up The Mouth of the Wanapitei

As for paddling east to 634 (old #633) – it was a “no”!  Instead, as we came up to the east end of Pig Island and the collection of cottages there, we decided to turn north towards Thompson Bay and the mouth of the Wanapitei River. As if to tempt us to reconsider our choice of route, the rain stopped right around then and we got to paddle up the mouth of the Wanapitei on water that looks as calm as it does at the river mouth in the photo below!

paddling north up the mouth of the Wanapitei River

It turned out to be a beautiful way to end a French River/Georgian Bay canoe trip. For the next eight kilometers, we had the feeling we were paddling in a deciduous southern Ontario forest and not past the rock formations of the previous few days. As a bonus –  still no rain!

Thompson Bay to Hartley Bay – 12.5 km.

Along the way, we passed a couple of canoe parties, the second in two days but other than that the only ones we had seen since Lake Nipissing some eleven days before.  The almost-emptiness of French River Provincial Park before Canada Day and after Labour Day is one reason we keep coming back in mid-June or mid-September!

————–

Back At Hartley Bay Marina

And then it was the home stretch, the 4.5 kilometers from Kentucky Club Island to Hartley Bay Marina.  Somehow we had knocked off 19 kilometers in a morning. We had left Campsite 690 at 8:30; it was now 12:30 and we were cruising towards the marina dock.

unloading the canoe at Hartley Bay Marina dock

Over the 45 minutes or so we got the following things done:

  • One of the Marina staffers drove our vehicle to the loading area from the parking lot at the marina where it had been sitting for the past 11 days. Valet parking – priceless!
  • We hauled all the gear and the canoe up from the dock to our vehicle and loaded everything in or on the car.
  • We went to the Marina office and paid the bill.  Included were the following: the shuttle from Hartley Bay to Sucker Creek Landing on Lake Nipissing’s West Bay ($140.); parking our vehicle at the marina for 11 days @ $10. a day = $110.  We had already paid the overnight camping fee on Day 1 when we first arrived at the reception desk.  We camped at FRPP sites on 10 of the 11 nights we were out.  Total bill for the two of us (both seniors) = $8.14 x 20 =  $162.80.   See below for the fee schedule …

  • we changed into the non-tripping clothes that we had left in the vehicle – nothing like slipping into clean stuff after a week and a half of living in the same clothes and haphazard washing up!

————–

 French River Visitors’ Center

Once we got to Highway 69 and turned right for the 3 1/2 hour ride back to Toronto, we had one more stop to make.  The last time we had been up at French River, we had gone to the Visitors’ Center, only to find it closed. [It was a Wednesday in mid-September.] We would have better luck this time!

We spent about forty-five minutes checking out the exhibit, which focuses on the river from various perspectives: Indigenous Peoples,  European missionaries and explorers, fur traders and voyageurs, geologists, artists  … it is definitely worth stopping, and you come away having added context and history to your experience of the river, no matter how it was that you spent time with it.

entrance to French River Interpretive Center’ display area

birchbark canoe on display at the French River Center

Group of Seven-like painting of  a French River scene

Blake Richardson’s classic view of the French River looking south from Hwy 69 draws you in with an image that is more than initially meets the eye, with elements not so much hidden as embedded in the surface view we all see. the artist explains his process here.

a Blake Richardson  interactive painting at the French River Interpretive Center

Click on the header below to see more of this Canadian artist’s work.

Our French River from top to bottom was done.  We headed south figuring that our timing was pretty bad – we would be hitting the 401 at the top of Toronto around 4 p.m.on a Friday!  Somehow it turned out to be not so bad and by 5 p.m. we were sitting in my Riverdale kitchen.  Living in southern Ontario,  both my brother and I love a canoe trip that only requires about four hours of driving to the put-in and yet has a wilderness feel about it.  We may have been to the French a few times – but we’ll be back again for more!

If you are interested in getting to know the French River, check out the following series of reports we’ve put together over the last five years –

————–

Links To Other French River Trip Reports

1. The French From Top to Bottom:

2. The French River Delta & the Bustards:

3. Philip Edward Island:

Philip Edward Island canoe trip route

4. From Killarney’s Chikanishing Creek to Snug Harbour 

Kayaking Georgian Bay  – From Killarney To Snug Harbour – Intro & Logistics

Days 1 & 2  Chikanishing Creek To Solomons Island to NE of Point Grondine

Days 3 & 4  Point Grondine To The Bustards’ Tanvat Island To S of Byng Inlet

Days 5 & 6  S of Byng Inlet To Hangdog I. Channel To Garland Island (Minks)

Days 7 & 8  Garland Island to Franklin Island To Snug Harbour

Posted in Georgian Bay, wilderness canoe tripping | Tagged , , , , , , , , , , , , , , | 6 Comments

Bhutan’s Snowman Trek: Day 23 – Rerethang To Upper Sephu

Last revised on November 21, 2022.

Table of Contents:

Previous Post: Day 22 – Tampoe Tsho To Rerethang Via Thampe La

Bhutan’s Snowman Trek: Day 22 – Tampoe Tsho To Rerethang Via Tempe La

——————

From Rerethang To Upper Sephu

  • Date: Sunday, October 20 (The trek began on September 28!)
  • Time: 5 hours
  • Distance: 13 km.
  • Start point altitude: Rerethang  3670 m
  • Endpoint altitude: Upper Sephu   2876m

For the past few evenings, dinner-time conversation had centered increasingly on our plans after we finished the trek. Plane connections, work commitments, future trips … all signs that the end was near! Over the past three weeks, we had walked over 300 kilometers through some pretty crappy weather (the first ten days) and over some fairly rough terrain, challenging even to yaks and horses, never mind trekkers! We had also walked into some stunning vistas, and in the last half of the trek, the peaks would often be in full view and not be shrouded in cloud cover.

Almost all 16 of us made it, though one dropped out in Laya with a severe respiratory issue and another on Day 21 with a stomach problem.

We had one last section – the 13 kilometers from Rerethang to the endpoint at Upper Sephu. We had left the alpine; the morning would start on the west side trail down the Nikka Chhu across relatively flat and open terrain. The satellite image below shows the stretch from Rerethang to Maurothang. It was easy walking.

After Maurathang, we crossed to the east side, and the trail mostly went across the forested slopes. We were 50 or 100 meters above the river as we made our way south. Along the way, we also crossed several streams that tumble down to the Nikka Chhu -either rock hopping our way across or making use of the wooden bridges.

The red line on the satellite image below approximates our route down the Nikka Chhu from Maurothang to Upper Sephu. It took about 3 1/2 hours at a brisk pace to get done. In the process, we dropped another 800 meters in elevation. We had not been below 3000 meters in three weeks!

looking up the Nikka Chhu from the trail to Upper Sephu

the Nikka Chhu as it flows down towards Sephu

Along the way, I had my first hard fall of the trip! 22 days without incident, and an hour before the end, I placed my right boot on a sloped wet rock only to have it slip down. I lost my balance, and somehow the right side of my rib cage bumped hard into a rock. The trekking poles I always have in my hands helped reduce the fall’s severity, but it still hurt. It was mild enough that I could keep on walking, but every once in a while, there would be a stab of pain if I moved in the wrong way.

[It took about three weeks for the pain to go away. Back in Toronto, I had trouble lifting my right leg over the top tube of my bicycle. And then one day – no pain! Don’t you just love how time itself is often the answer, at least in the short run!]

yaks lounging on the trail from Maurothang to Upper Sephu

——————

The  Celebration at Upper Sephu

Upper Sephu is at the end of a dirt road that winds its way up the east side of the Nikka Chhu from the Bumthang-Ura highway and Sephu proper. A few years ago, this road did not exist, and trekkers walked right to the highway and the Nikka Chhu bridge, another six kilometers away.

We were greeted there by the Yangphel support team. They had arranged lunch for us, with bottles of wine and beer and a celebratory cake. There we are, sitting at our table!

I gathered some of the leftover bits of meat and gave a local dog watching the proceedings a surprise treat. But then, maybe it wasn’t a surprise! He may have learned that gatherings like ours often result in some freebies!

a local dog watching the proceedings at Upper Sephu

Not keen on dealing with the impact of even a bit of alcohol on my head while we spent the next four hours rocking back and forth on the bus, I decided to postpone my reintroduction to beer until that evening. On the table was a bottle of Bhutan’s finest red wine, imported in bulk from South Africa and bottled in Bhutan. Later that evening, I ended up ordering a can of tonic water! Fun guy!

The lunch table at Nikka Chhu – trek done!

——————

Tipping Issue – “Voluntary” But Expected

Tipping is always a big deal at the end of these treks. Over the past three evenings, the World Expeditions guide had

  • collected some U.S.$300. to $400. from each of the 16 trekkers and
  • come up with a formula to calculate each support staff member’s share based on their role.

The tip – and the concern about it shown by the guides from Day 1 –  was just another reminder of economic reality trumping what is ultimately the nonsense of the Gross National Happiness concept concocted by Thimphu’s political elite on behalf of the vast majority of Bhutan’s citizens.

The speeches were made, thanks were given, the tips were distributed to each member of the crew, a few group photos of the support crew and their trekker guests, final handshakes and hugs …

The hard-working  team which made our Snowman Trek happen

——————

The Trek Operators: World Expeditions /Yangphel 

World Expeditions is an Australia-based adventure travel company that

  • organized the trip,
  • created an attractive webpage detailing the trek,
  • brought together the 16 trekkers,
  • ensured that visa and other issues were dealt with,
  • worked with the local adventure travel agency, Yangphel, to ensure that specific standards were met, and
  • assigned one of its own guides to accompany the local guide.

I was told that WE had been using Yangphel to handle its Snowman trip for the past two years.

The two decades’ worth of experience with high-altitude trekking and Himalayan climbing that the WE-assigned guide – Angel Armesto –  had was a bonus. The local guide – Tandin Gyeltshen – assigned by Yangphel, was also very experienced and knowledgeable, thanks to his twenty years of handling all sorts of tours. He had done birding tours and various trekking routes, including the Snowman Trek a dozen times. Both were just nice guys who made the trip more enjoyable.

—————

Pre-2022 Breakdown of Trek Costs For an “International” Tourist

  • $7800  + $400 tip is what the trek cost me.
  • $6750 (27 days x $250) went to the local trekking agency and to the Bhutanese government. The Bhutanese charge their “high value, low impact” (that is, non-Indian) tourists US $250. a day to be in Bhutam.
  • $1755  for the entire 27-day stay was the Bhutanese government’s “sustainable development fee”  (a $65-a-day tourist tax)
  • $5000 – what the trekking agency got per trekker
  • $1050 per trekker – the World Expeditions charge for making the trip happen and to pay for their own assigned guide.
  •   $400 The “voluntary” tip expected by all

Adding US$2000.  for airfare and airport taxis and another $200. for 2 nights at a decent hotel not far from Indira Gandhi Airport, my Snowman Trek was the most expensive trek I have ever done and one that I will probably never surpass!

Since 2022

Note: In July 2022, the Bhutan Government raised the daily Sustainable Development Fee from $65 to $200! This added another $3645 to the final cost of the 27-day Snowman trek and effectively gave the “high value, low impact” tourists from Europe, North America, and Asian countries the incentive to travel elsewhere.

 A year later the Bhutanese government backtracked from its ill-considered tax grab and lowered the SDF to US$100. while leaving the fee charged to Indian visitors at US$15.  

The July 2024 “sale” price posted on the WE website is now US$12,760, about 40% more than it was in 2019!  The trek is billed as the Bhutan Snowman Exploratory Trek. One reason for the increased cost is the addition of 2 extra days in the third and last section of the trek (the one from Chozo to Upper Sephu).  


Meanwhile, the KE Adventure Travel Snowman Trek at $14,480 also includes

  • two nights at a Kathmandu hotel (about $250)
  • a night at Gangtey at the end of the trek
  • a final night in Thimphu instead of Paro
  • the $650 flight from Kathmandu to Paro and back.

The KE trek route itself is the same as the WE itinerary. It is probably the standard route that all Snowman groups have been taking for years, which makes the word “exploratory” in the World Expeditions promo a bit of a joke.

KE Adventures 2024 Snowman offering

—————

Bypassing The Foreign Travel Agency To Reduce Costs

While you could just arrange the trek yourself through a Bhutanese agency,  the problem is one of numbers. You would need to find at least one and preferably two or three other trekkers who would be willing to commit to the trip at the same time as you.

Thanks to its attractive website, World Expeditions and other companies like it do the finding of trekking mates for you. That is worth at least a couple of hundred dollars. Pre-Covid, a solo visitor to Bhutan paid an extra $40. a day on top of the $250; a couple had to pay $30 each extra. Being with a larger group usually brings down the cost.

——————

Our Trek Size of 16 – Not Ideal

However, a group size of 16 trekkers is not ideal. Consider the three previous organized treks I have done –

There were almost as many trekkers on this Snowman trek as on my previous three combined! With 43 horses and a dozen support staff, we were a small village on the move!

See the end of this post for more on Bhutan’s no-longer-functioning  “high value, low impact” tourism policy. 

final group shot of the crew – trekkers and support staff

By 1:30, we trekkers would hop into the bus pictured below. Destination – Punakha and what would be a newly-built 3-star hotel (the Zhingkham Resort) on the slopes on the west side of the Mo River. Showers, wifi, email, food choices, and food choices other than the trek food I had seen enough of …

Yangphel staff at Upper Sephu with our bus to Punakha

our Punakha camp spot was definitely an upgrade

Punakha and the confluence of the Mo and Pho Rivers

the Punakha Dzong – the view from the Zhingkham Resort

__________________________

Complete Day-By-Day Trip Report! 

Laya To Upper Sephu high passes and campsites graph

__________________________

Tourism Policy Before July 2022:

“Unregulated” Tourists:

Before the tourist policy changes introduced in July 2022, only citizens of India, Bangladesh, and the Maldives could tour Bhutan on their own as “unregulated” visitors. Many entered Bhutan in their own vehicles. No visas were required. They did not need to hire a guide for the duration of their stay. No proof of travel insurance was required. Indian citizens accounted for 92% of the “unregulated” regional tourists and were exempt from a mandatory minimum $250-a-day tour package.

————-

“International” Tourists:

Meanwhile, “international” visitors had to enter via Paro International Airport on Bhutan’s Druk Airlines. Drukair’s prices are rather steep. In May 2019, I paid

  • 1595.CDN for an Air Canada  Toronto-Delhi return ticket – 12000 kilometers
  • $864.CDN for my Drukair New Delhi- Paro return ticket.     1,200 kilometers       

International travellers also ended up subsidizing the fares of Indian passengers, who paid half of what they did.   On arrival, the “international” tourists had to be in the care of a local travel agency and an assigned guide. They would also have paid $40. for the entry visa. They could not rent a vehicle, take a bus from town to town, or trek alone.

For “international” visitors, the mandatory minimum all-inclusive package deal of $250. a day was required to enter the country. (Visitors could upgrade their accommodations from 3-star to 4 and 5-star and thus push the daily cost beyond $250.) For the mandatory minimum package, the cost breakdown was as follows –

  • $185. went to a local travel agency that handled the visitors’ mandatory tour package  – transport, food, accommodation, cultural center entrance fees, guides, etc.
  • a $65-a-day government tax called the  ‘Sustainable Development Fee.’
  • Solo travellers were charged an extra $40. a day; a party of two paid an additional  $30.-a-day surcharge for each person.

————-

The Rationale For the Mandatory $250  And The Reality Since 2010

The Bhutanese government’s intent a half-century ago was to prevent the country from becoming a low-budget hippy backpacker destination like neighbouring Nepal. The tourism policy has been described as “high value, low volume/ impact.”

However, this controlled tourism policy was shattered in the decade from 2010 to 2019. The graphs above and below illustrate the reason. As India’s middle class has grown more affluent, so has the number of Indian visitors.

Indeed, the growth since 2010 has been so dramatic that the “high value, low impact” policy has been swamped by a competing approach – “low value, high volume/impact.”

The stats below show that while the “high value” number of arrivals pre-COVID was reasonably stable, the number of Indian arrivals skyrocketed.

Bhutan tourist arrivals 2010 – 2018 “high value” and the total number

See the article Bhutan throws up paywall amid surge of Indian tourists from The Hindu (2019). The writer examined the tensions created by the current setup with two opposing tourism goals.

The result was that you’ve got to be either financially well-off and, as a result, probably an older”international” traveller ( 45 years +) to visit Bhutan – or you had to have an Indian passport! My trekking group’s average age was in the low 50s! Most were lawyers, doctors, company execs…these were clearly not “budget” travellers!

In 2019, the average Indian tourist spent about $50. per day compared to the $250. that “high value” tourists did. [See here for the data source. Interestingly, the one statistical chart absent from the study is the most obvious one, which shows the dramatic rise in “low value, high volume” tourism!] Meanwhile, the “high value, low impact” Indian tourists were probably flying off to Switzerland or Paris for their vacations!

————-

Tourist Figures For 2019 (The Year before COVID )

In 2019,  315,599 tourists visited Bhutan. Of that

  • 72, 199 were of the “high value, low impact” class, up less than 1% from the previous year.
  • 243,400 were in the “unregulated” regional category, up 20% from 2018.

To be fair,  the large numbers of “unregulated” regional tourists were mostly found in the urban centers and temples and not on the trekking trails, perhaps because the agencies were more interested in catering to $165. a day “high-value” clients than those with more limited financial means.  During the 23 days on the trek, we met one Swiss group in Lunana, a German couple in Laya, and a local student group at Jomolhari B.C. That was it for traffic on the trail. It was, however,  a different story at the Tiger’s Nest!

————-

Impact of Covid on Bhutanese Tourism:

The COVID-19 pandemic would have a devastating impact on Bhutan tourism. In 2020 arrivals dropped by 91 percent from 315,599 visitors in 2019 to 29,812. There was a 92% decline in gross receipts from the previous year! In 2021 first “high value, low impact” tourist arrived in September!

————-

The Continued Promotion of a False Image of Bhutan 

Despite the new reality, the Bhutanese government and travel agencies continue to promote the image of Bhutan as a “high value, low impact” destination. This government poster from 2019 pretends that all is good!

The poster also celebrates an off-the-cuff comment made by the King in the 1970s about “Gross National Happiness,” which somehow became government policy a decade later! More than anything,  it seems like a useful piece of fantasy concocted by Thimphu’s financially well-off political elite to diffuse any political or social dissatisfaction.

As Karma Phuntsho points out in his The History of Bhutan:

“The recent efforts of the government to promote Gross National Happiness as a new economic and development paradigm in forums such as the UN has further complicated people’s imagination of Bhutan both at home and abroad. Increasingly, more and more people now describe Bhutan as a happy country, despite the fact that a large percentage of the Bhutanese live in depressing poverty and many Bhutanese youth would willingly grasp the opportunity to work in an American kitchen or European warehouse if given the chance.”

————-

A recent editorial (May 13,2023)  at the Kuensel website – Is Bhutan Heading For Trouble? – highlights the reality of conditions in Bhutan.

Somehow a leap is made from the fluff of “Gross National Happiness” to the notion that the people of Bhutan are the happiest in the world. The Bhutanese film Yak In the Classroom opens with the ironic image of the main character, who is consumed with migrating to Australia,  wearing a T-shirt with the GNH phrase written on it!  Meanwhile, Bhutan ranks 129th in the U.N.’s Human Development Index (2019 stats – p.13 of 19).

In the political sphere, The Economist’s 2021 Democracy Index has Bhutan ranked 81st. Credit must be given for Bhutan’s recent transformation from a monarchy to what The Economist describes as a hybrid regime. Its 5.71 score in 2021 is far from the low 2.62 it scored in 2006.  However, the continued impulse of obsequious Bhutanese officials to flatter past and present members of the Wangchuk family for their “farseeing wisdom”  is a bit much to take.

—————————–

An article –Tourism in Bhutan and COVID-19’s Lasting Impacts– from November 2020 – examines the state of Bhutanese tourism without acknowledging or factoring in the changes that have occurred since 2010, thanks to the massive influx of Indian tourists.

This Kuensel article –Promoting tourism at the World Expo– from January 2022 pretends that Bhutan’s tourism policy, the one developed by its “visionary kings” and grounded in the GNH concept,  is still the “high cost, low impact” one from the 1970s to the early 2000s!

Dorji Dradhul said that the tourism policy was far-sighted, crediting its success to the visionary Kings. “Our policy is grounded in our development policy of GNH.” (He)  interpreted the tourism policy as offering an unforgettable experience to the tourists, while also regulating the number of tourists visiting Bhutan.

————————

In the end, my view is that a three-week trek in Sagarmatha National Park in Nepal at

  • one-third of the cost with
  • ten times the stupendous mountain views
  • and overall better weather conditions(historically at least)  in October and November

is a much better deal.

The posts linked below look at  The Three Passes of Everest Trek in Sagarmatha National Park in Nepal, which I would argue is the world’s #1 high-altitude trek.  After my Bhutan experience, on top of many more Himalayan peaks and a vibrant Sherpa culture, I can add better weather and clear skies!

The High Passes of Everest: Planning The World’s #1 Trek

The High Passes of Everest Trek: Lukla to Namche – Days 1 – 3

—————————–

2022: Bhutan’s Revamped Tourism Policy

I was sure the Deutsche Welle website had made a typo error when I read that the daily “sustainable development fee” for non-Indian visitors to Bhutan had been raised from $65. a day to $200.

———

But no …. this New York Times article (July 5, 2022) explains the new direction in Bhutan’s tourism policy, one not hinted at in any of the articles mentioned above. This is an unexpected development!

The NYT article uncritically echoes the happiness myth promoted by the Tourism Council of Bhutan and fails to mention that international visitors make up less than 25% of Bhutan’s visitors. It does not factor in the other 75% of Bhutan’s visitors –  Indian tourists.

However, as of July 2022, Indian tourists must

  • pay a $15. tourist tax for each night in Bhutan, still a bargain compared to $200 that others must pay,
  • pay $45. per day tax if they drive their own vehicle in Bhutan,
  • have an assigned Bhutanese guide,
  • have travel insurance,
  • and pay entrance fees to museums, temples, and dzongs. It is $25. for the Tiger’s Nest!

It seems that the Bhutanese tourism policy aims to severely reduce the number of Indian tourists!  The 244,000 in 2019 was clearly not sustainable. Unfortunately, it will mean that many in the Bhutanese tourism industry will have to get used to significantly fewer visitors.

See here for some discussion –

———

Posted in Bhutan, hiking/trekking | Tagged , , , , , , , , , | 2 Comments

Bhutan’s Snowman Trek: Day 22 – Tampoe Tsho To Rerethang Via Tempe La

Last revised on June 25, 2024

Table of Contents:

————-

The Day’s Basic Data and Map

  • calendar date: October 19, 2019.
  • time: 6 hours, including lunch and a stop at the Snowman Trek store above Rerethang
  • distance: 11 km.
  • start point altitude: Tampoe Tsho  4323m
  • endpoint campsite: Rerethang 3670m
  • high pass crossing: Tempe La  4665m
  • Maps: Bart Jordans’ Trekking in Bhutan has some useful overview maps of the many possible variations of the Snowman, as well as of other treks.
  • See here for a Google Earth view of the day’s walk. It helps to use the Google Chrome browser! The location marker is for Rinchen Zoe La.
  • I used a Sony RX100 III to frame most of the images you’ll see below; a fellow trekker’s Huawei P30 captured the others. (Thanks again, O, for letting me use them!)

Previous Post: Day 21 – Tsho Tsho Thampa to Tampoe Tsho

Bhutan’s Snowman Trek: Day 21 – Tsho Tsho Tshampa To Tampoe Tsho

————-

A Preview of the Day’s Walk


Thampe Tsho campsite – morning shot

Our last full day of trekking – and a scenic one at that!  On tap was

  • our last pass of the trek (it was #11) and then
  • a walk along the shores of two lakes, a famous one known as Om Tsho and another one 100 meters below.
  • Then a steep descent to the headwaters of the Nikka Chhu, whose course we would follow for the next day.

————-

The Hike To Tempe La From Tempe Tsho

The trail to Tempe La from Tempe (Thampoe) Tsho – from the bottom right to top left

It started with a walk into the middle of the terrain pictured above and then curled left up to the pass. In an hour, we had ascended about 300 meters on a walkable trail.  I stayed up there for a few minutes but, given the chilling effect of the blowing wind, decided to generate some heat by heading down the other side.

Tampoe Tsho to Tempe La

a view from Tempe La back to Thampoe Tsho

Tempe La – looking down to Tempe Tsho

cairn and prayer flags on Tempe La above Thampoe Tsho

Looking south from Tempe La – the trail to Sephu

I’d end up lounging about a half-hour down at the bottom of the hill, enjoying the wind-free spot and the sunshine.  The two images below show the actual trail from the pass; it heads diagonally to the left and stays above the rock-strewn valley floor where I was waiting. I’d eventually join the rest of the crew a kilometre further down.

the start of the trail down from Tempe La

satellite view of Tempe La – Om Tsho area – see below for the photo of the lake taken from the red dot

One last look back at Tempe La and then it was time to move forward!

panorama for the trail between Thampe La and Om Tsho

————-

Om Tsho and A Nyingma Treasure Trove

It would not take us long to come to one of those WOW moments, one of those memorable views. In this case, it was Om Tsho (4322m).

The lake is famous for supposedly yielding Buddhist “treasures” to Pema Lingpa (1450-1521).  He was a Bhutanese-born follower of the Nyingma school of Tibetan Buddhism.  Local Buddhists believe they had been put there by the Himalayan Buddha, Guru Rinpoche, some six hundred years previously.  These treasures are known to  Himalayan Buddhists as terma; the one who finds them, thanks to guidance from Guru Rinpoche, is called a terton.

An hour spent reading through The Life and Revelations of Pema Lingpa turned up no mention of Om Tsho and what he found there, nor did another half-hour of internet surfing of other sources.  It is quite likely that what Lingpa is said to have hauled out of the lake included a text. It is believed that the terma texts were written in a Dakini script that only the terton could translate.

————-

Parallels With Mormonism

All of this brings to mind Joseph Smith, who claimed to have found a similar “treasure” [the Golden Plates] in upper New York State.   The plates would provide the foundation of a religious movement known as the Church of Latter-Day Saints (Mormonism), an offshoot of Christianity. Smith was able to translate them from a language that he did not know thanks to angelic help.  Coincidently, the number of believers is approximately the same – 15 million Mormons and 20 million Himalayan or Vajrayana Buddhists, an offshoot of the teachings of Siddhartha Gautama based on esoteric concepts from a thousand years after his time. Like Mormons to the vast majority of Christians, these Buddhists believe themselves to be the true holders of the Buddha’s teaching.

Om Tsho is the lake pictured below.  I took the photo from the spot indicated by the red circle in the satellite image above.

————-

From Om Tsho To The Lower Lake

Om Tsho – a view from the north

the horses of our lunch team pass by the top of Om Tsho

a Snowman Trail view of Om Tsho from the south end

From Om Tsho the trail dips down to cross its outlet stream and then climbs up again to a ridge overlooking a second smaller lake 100 meters below.  In the image below I am looking down at that outlet stream and some of our horses and crew as they cross it and continue upward.

our horses as they cross the outlet stream from Om Tsho

The first of two steep downhills are up next:

  • 150 meters down to the lower lake from Om Tsho
  • 230 meters down to the broad valley floor and the headwaters of the Nikka Chhu

satellite view – Tempe La to Zezey Thang

the smaller lake below Om Tsho – with inflow from the upper lake

The trekkers in the two images are starting or are in their descent from Om Tsho to the lower lake.

Snowman trekkers on the ridge below Om Tsho

The trail from Om Tsho to the lake below

————-

Down To the Nikka Chhu Headwaters

When I reached the lower lake, I sat on a rock at the top end of it and looked down at another nice view.  On the left of the image below, you can see the trail and one of my fellow trekkers, who is pushing on to the other end. When I got there, I found a single string of prayer flags draped across the outlet stream of the lake.

the top end of the small lake below Om Tsho

And then the second steeper and longer drop in elevation. Here is the Lonely Planet Guide to Bhutan description:

From the second lake to the headwaters of the Nikka Chhu is a descent so steep that even yaks are reluctant to come down this stretch.  LP Guide To Bhutan

A few of our horses coming down a steep section to Zezey Thang

waterfall from the lake just above ZeZey Thang

————-

A Brief Stop At The Snowman Shop

from the Snowman Shop to the Rerethang Campsite

The yak herder’s place south of Zezey Thang

the headwaters of the Nikka Chhu

yak herder’s drying sheets by Rerethang

two young women tending the Snowman Shop

————-

Corral Campsite At Rerethang

the Nikka Chhu as it approaches our campsite on its floodplain

approaching our Rerethang campsite after a brief stop at the Snowman Shop for beverages

Next Post: Day 23 – Rerethang To Upper Sephu

Bhutan’s Snowman Trek: Day 23 – Rerethang To Upper Sephu

Posted in Bhutan, hiking/trekking | Tagged , , , , , , , , , | Leave a comment

Bhutan’s Snowman Trek: Day 21 – Tsho Tsho Tshampa To Tampoe Tsho

Previous Post: Day 20  – Jichu Dramo To Tsho Tsho Thampa

  • calendar date: October 18, 2019.
  • Time: just under 6 hours total, including lunch and rest breaks
  • distance: 15 km.
  • start point altitude: Tsho Tsho Thampa  (aka Thsongsa Thang)  4342m
  • endpoint campsite:  Tampoe Tsho  4323m – see OpenStreetMap topo here
  • high pass crossing: none
  • Maps: Bart Jordans’ Trekking In Bhutan has some useful overview maps of the many possible variations of the Snowman, as well as of other treks.
  • See here for a Google Earth view of the day’s walk. It helps to use the Google Chrome browser! The location marker is for Rinchen Zoe La.
  • I used a Sony RX100 III to frame most of the images you’ll see below; a fellow trekker’s Huawei P30 captured the others. (Thanks again, O, for letting me use them!)

Previous Post: Day 20  – Jichu DramoTo Tsho Tsho Thampa

Bhutan’s Snowman Trek: Day 20 – Jichu Dramo To Tsho Tsho Tshampa Via Rinchen Zoe la

—————


Coming up – Day 4 of our 5 1/2 Day Lunana to Sephu Traverse! We had already done:

  • Chozo to CS West of Tsho Chena on Day 1
  • Tsho Chena CS to Jichu Dramo Via Loju La on Day 2
  • Jichu Dramo to Tsho Tsho Tshampa Via Rinchen Zoe La on Day 3

satellite view of the walk from Tsho Tsho Thampa to Tampoe Tsho

Re: the day’s walk:  We had five kilometers less to cover but the topo map showed that we’d be crossing a series of closely bunched-up topo lines as we left the river and headed for our lakeside campsite in a side valley whose lake –  Tampoe or Thempe Tsho – flows down into the Thampe or Tampe Chhu.

Note: wouldn’t it be nice if the Bhutan Tourist Board initiated a standardization of the spellings of the country’s various places and geographical features.  We do not need seven different spellings of Jomolhari!  This particular day was a special treat!  Tsho Tsho Thampa to Thampoe Tsho? Or is that Thsongsa Thang instead of Tsho Tsho Thampa and Tempe instead of Tampoe Tsho?   … it is confusing!  Go to Google to find out about a spot on the Snowman Trek and what it will turn up will depend on how you spell it!

trekkers’ tents at Tsho Tsho Thampa –  morning cloud

some of our horses at Tsho Tsho Thampa – camp takedown

We had some sad business to take care of as the day began. A severe stomach issue led the guides to call in a helicopter from Thimphu to pick up one member of our trekking group. A landing area was established some distance away from the camp; we said our goodbyes and set off as she and the guides waited for the ‘copter’s arrival.  We were perhaps two kilometers down-valley when we saw it come by.  Two minutes later it was on its way back to some medical care. She would rejoin us three days later in Thimphu; she was doing okay and was relieved that the insurance coverage for the medivac had come through.

The cost of the helicopter extraction? An extortionary $10,000 U.S.! A more fair charge for the 90-kilometer flight would be in the $2500. – $3000. range.

  • Costs would be covered,
  • a small profit would still be made, and
  • Bhutan’s government would be fulfilling its role as a concerned and caring host for the “high value, low impact” trekkers whom it charges U.S. $250.  a day to traverse isolated and high-altitude regions of the country.

Instead, what visitors to Bhutan get is a state-sponsored version of the decades-long helicopter scam that has plagued Nepal and led to foreign insurers threatening not to provide insurance for travellers to that Himalayan country. (See here for some background on the Nepal situation.)

The company providing the medivac (the state-owned  Royal Bhutan Helicopter Services)  has had 2 helicopters – older Airbus H130s-  since 2015. Before that, Indian Army helicopters would be called into service if needed!  In 2020, RBHS is gouging a tourist in need of medical aid of at least US$7000.  Of course, as with Druk Air,  the helicopter outfit has a monopoly and can charge whatever it wants. This does not make it right.

The first part of the morning’s walk was down a broad valley. The early morning snowfall lingered for a while on the scrubs we passed by but by mid-morning it would all be gone.

the start of the day’s hike – down a broad section of the Thampe Chhu

We would never cross the Thampe Chhu during our descent of the valley, remaining on the west side right to our lunch spot.  the three following pix capture some of the scenery.

looking down the Thampe Tsho

looking upriver from the trail along the Thampe Chhu

the trail on the west side of the Thampe Chhu

We had started off at 4342 m; we were at 3989m by noon and our lunch stop. As the table got set up, some of our horse team passed us by.  We had come down 350 meters in some easy walking.  Kinley and Karma and the horses who were on lunch hauling duty remained behind to organize everything!

lunch spot at a clearing on the banks of the Thampe Chhu

the horse lunch team gets a one-hour break on the banks of the Thampe Chhu

That 350 meters of descent in the morning? Well, we’d gain most of it back on our afternoon hike to the day’s campsite on the west side of Thampoe Tsho(4323m) 4312m.     Once or twice I remember thinking – “Will this never stop going up?”  It was relentless. As always, with a rest break or three to let my heart rate fall below 130 again, it got done.  Parts of the heavily forested mountainside had me looking for Frodo and his fellow hobbits off on their own Bhutanese adventure – it was magical.

forest trail above the Thampe Chhu

some serious uphill to get to Thampoe Tsho campsite

Walking around the corner and into the hidden Thampoe Tsho Valley was a WOW moment.

trekkers approaching Tempoe Tsho on the Snowman Trek

the outlet from Thampoe Tsho

the Thampoe Tsho trail to the campsite

When we got to the camp, the tents were mostly set up. Soon everyone had hauled their duffels inside their “room with a view” just above the lake.  Outside, I could hear the pitter-patter of rain hitting the tent fly.  I’d stay inside the tent until tea and biscuit time an hour or so later. In the image below you can see the blue cook tent on the left, the trekkers’ dining tent to its right, and two of our 12 trekkers’ tents on the right.  The lake was just below our tents.

Thampe Tsho campsite – morning shot

Sad to report that this campsite was a mess – garbage all over the place. Floating in the water, badly hidden behind rocks…the site needs a real cleanup.  Perhaps the Jigme Dorje park officials could hire some locals to tend to these sites. 99% of the garbage is produced and left by Bhutanese people. It is either those young men working for trekking agencies who get careless after their clients have left and they take down the camp – or it is local travellers passing through and making use of the campsite.

some garbage left behind by previous trekking groups or local travellers

On Day 1 of our trek, we had each been given a World Expeditions- labelled nylon sack to put litter in. I assumed it was for my litter and it kept my Clif Bar wrappers and all other refuse I generated in one place; at the end of the trip I handed it over to the assistant guide.

Given that it gets at least half the trekking traffic in Bhutan, the trail from Shana to Jomolhari is especially bad for trailside and campsite garbage. Congrats to those in my trekking party who also stopped to pick up random bits of Bhutanese-generated garbage on the side of the trail;  I did not do so and focussed just on my own.

a view of Thampe Tsho from the campsite

garbage left by previous trekking groups or local travellers

Day Four of our Lunana-Sephu Traverse – the last of the Snowman Trek’s sections – was done. Still to go – a full day the next day and a half-day to finish it off. After 21 days on the trail I was definitely motivated by a shower and some different food, hopefully vegan-friendly.

Next Post: Day 22 – Tampoe Tsho to Revethang

Bhutan’s Snowman Trek: Day 22 – Tampoe Tsho To Rerethang Via Tempe La

Posted in Bhutan, hiking/trekking | Tagged , , , , , | Leave a comment

Bhutan’s Snowman Trek: Day 20 – Jichu Dramo To Tsho Tsho Tshampa Via Rinchen Zoe la

  • calendar date: October 17, 2019.
  • time: 8.5 hours total, including lunch and a few rest breaks
  • distance: 19.5 km.
  • start point altitude: Jichu Dramo 5015 m; 5060m (Jordans)
  • endpoint campsite:  Tsho Tsho Tshampa  (aka Thsongsa Thang)  4342m;            Jordans has 4450m. – see here to see which is closer to the OpenStreetMap topo 
  • high pass crossing: Rinchen Zoe La – 5300m (my Garmin); 5326m (Jordans)
  • Maps: Bart Jordans’ Trekking In Bhutan has some useful overview maps of the many possible variations of the Snowman, as well as of other treks.
  • See here for a Google Earth view of the day’s walk. It helps to use the Google Chrome browser! The location marker is for Rinchen Zoe La.
  • I used a Sony RX100 III to frame most of the images you’ll see below; a fellow trekker’s Huawei P30 captured the others. (Thanks again, O, for letting me use them!)

Previous Post: Day 19 – Camp West of Tsho Chena To Jichu Dramo

Bhutan’s Snowman Trek: Day 19 – Tsho Chena To Jichu Dramo Via Loju La


a bit of early morning snow at our Camp near Tsho Chena

We crawled out of our tents at Jichu Dramo at 6:30 and into a snow shower that had blanketed the ground and the camp.  It did add a touch of wonder to what was brown rock rubble!

horses in front of the dining tent on a snowy morning at Jichu Dramo

By the time breakfast was done and we were ready for the day’s walk, the sun was already melting away some of the snow that had fallen.  The tent crew was busy taking down the camp.

our Jichu Dramo Campsite around 8 a.m.

On the to-do list for the day was crossing the highest pass of the trek, Rinchen Zoe La.  Since we were already at 5060 meters, the 240 meters to get to the top was not a big deal.

I had read the trip notes for the day before setting off. They provide this description:

It will take us several hours to gain the pass, and in the final approach the views are unmatched. Vast glaciers run down from a series of snowy mountains into two major glacial blue lakes that have a scattering of small ‘icebergs’ across them.

At the gap we take time to take photos and appreciate our achievement, then continue on to our camp. The hike to the camp involves a steep descent beside a moraine and some rock- hopping next to the river where we find our camp.

Not for the first time, I wondered just who wrote these trip notes and if (s)he had actually done the trek.

  • It will take us several hours to gain the pass, and in the final approach, the views are unmatched. – Within an hour and a half of setting off, some of us were standing on top of Rinchen Zoe La and, as nice as the views had been on the final approach, they did not match the views from the pass itself.
  • As for the vast glaciers run(ning) down from a series of snowy mountains, they are nowhere to be seen, nor are the small ‘icebergs’  floating on the lakes on either side of the pass.

What a fanciful account!

This CNN article (see here) provides some background on glacial melt in the Himalayas. At .5 meters per year, that would mean 10 meters of ice just since 2000.

Day 20 – from Jichu Dramo To the Thampe Chhu Valley

About a half-hour into the walk, I looked back at our campsite area and snapped the photo below.

looking back to Jichu Dramo from the trail to Rinchen Zoe La

The final stretch to the pass itself was the steepest but it was over fairly quickly.  In the image below you can see two trekkers on the right-hand side just about to head up that diagonal line that will take them to the pass, which I’ve indicated with an arrow.

trekkers heading to Rinchen Zoe La from Jichu Dramo

a glacial lake below Rinchen Zoe La

The views from Rinchen Zoe la were indeed memorable. All too often on the trek, especially in the first half, cloud cover and lack of sun meant that we experienced few of the majestic vistas our guide- and our guide books –  kept referring to.  During the half-hour I spent at Rinchen Zoe, the awesome view was not the only attraction.

Rinchen Zoe La panorama – looking north

Our arrival coincided with that of a Lunana yak team on its way (as we were)  to Sephu.  To watch these huge and seemingly ungainly animals make their way through the rock rubble was special.  It reminded me of the wonder I feel in the boreal forests of the Canadian Shield when paddling by a moose or two and seeing them quickly dance their way into the bush and into invisibility with such grace and assurance.

Alert: maybe a few too many yak images coming up!

yak team crossing Rinchen Zoe La (5300m)

a Lunana yak team making its way down the Rinchen Zoe La

Not only did we have the yaks to watch as they passed by –  our lunch team (Kinley and Karma) and their horses were also coming up so we waited until they had started their descent before we carried on.  I was actually surprised that we were using horses to do the high-altitude traverse from Lunana to Sephu.

Kinley and the lunch horse team coming across Rinchen Zoe La

some of our horses at Rinchen Zoe La

Coming down from the pass, we would walk for 1.5 hours to our lunch break spot. Having come down about 230 meters, we were at 5070 m.  We had passed some glacial puddles on our way there. None of them seemed very deep and, given global warming trends, will soon be completely gone.  As mentioned already, the vast glaciers mentioned in the day’s trip notes have shrunk significantly in the past twenty years.

the south side of Rinchen Zoe La – the trail passes some glacial

plateau with remnants of glacial lakes south of Rinchen Zoe La

yaks making their way through the scree to the south of Rinchen Zoe la

Lunch – the deluxe Bhutanese version!  The wind was blowing across the barren plateau and we were about as exposed as you can be!  There was a stark beauty to our spot, which was less than an hour from the pass. As the topo map above indicates, there is an extended flat area and we were sitting on the edge of it.

lunch on the south side of Rinchen Zoe La

The view from our lunch table – south of Rinchen Zoe La

The trip notes for the day indicated that we would be camping at Chukarpo (4600m). Since we were already at 5070, that meant less than 500 meters of descent. However, first we had to get to the south end of the broad, flat area that we were on.  That would bring us to the beginnings of the Thampe Chhu, which we would follow to the campsite. The next two photos illustrate some of the trail across that plateau…

trekkers heading south on a rough trail across a plateau of rock rubble

a glacial lake bed below Rinchen Zoe La

There are some possible camp areas as you descend the Thampe Chhu Valley.  Bart Jordans in his Trekking In Bhutan guidebook notes the following –

“The first possible camp is just after the steep descent at 4850m, with pasture and stone wall enclosures. Yanghu is a reasonably big, open, flat area, the limit to which the Chozo people are allowed to graze their yaks in the summer. Next is Chhu Karpo at 4600m, but a better choice lies 1hr further on at Tsho Tsho Tshang (Thsongsa Thang; 4400m; 5hr from the pass). People from Lunana and Sephu use Tsho Tsho Tshang as a trading place.”Excerpt From: Bart Jordans. “Trekking in Bhutan.” Apple Books.

Down the Thampe Chhu we went.  The weather had turned cloudy with occasional snow flurries which reduced visibility.  I would also be unaware that I was wearing my sunglasses for the next three hours!  Only when we got to camp did I realize!  The result was an even more dramatic view of the terrain we were covering than it already was.  Often we were hopping from boulder to boulder, careful not to slip on our choice of footing.  I worried about the people behind us and whether they would be able to discern a trail in all the rock rubble we were traversing.

My Garmin inReach did come out a few times as the afternoon passed. I would check to see if Chhu Karpo at 4600m was any closer.  I was perplexed when we walked from 4650m to 4550 meters without having stopped. I wondered where the camp was and where the horses were. To be honest, I did not notice a spot that called out “Chhu Karpo Campsite” as we were around 4600m. Strange! We kept on walking.

descending the Thampe Chhu to Tsho Tsho Tshampa

snow as we descend the trail along the Thampe Chhu

Not made clear to us was that we were not stopping at Chhu Karpo and that our campsite would be another four kilometers downriver. Over the next hour plus we descended another 250 meters until we hit a walkable section of trail that took us to our camp at Tsho Tsho Tshampa. [It is clearly visible on river right in the Google Earth view above!]  I never did hear an explanation for the change in the campsite. It could be that the plan was always to end the day at Tsho Tsho Tshampo, despite what the trip notes indicated.

The tent crew and animal handlers may have decided that the campsite at Chhu Karpo was not adequate so they kept going to the one we ended up at.  Perhaps they saw that there was nothing for the horses to eat at Chhu Karpo and that the lower one would be better?

Whatever!  The day was done, from the highs of Rinchen Zoe La to the lows of a difficult descent down the Thampe Chhu.

—————

Next Post: Day 21 – Tsho Tsho Tshampa to Tampoe Tsho

Bhutan’s Snowman Trek: Day 21 – Tsho Tsho Tshampa To Tampoe Tsho


Posted in Bhutan, hiking/trekking | Tagged , , , , , , | Leave a comment

Bhutan’s Snowman Trek: Day 19 – Tsho Chena To Jichu Dramo Via Loju La

  • calendar date: October 16, 2019.
  • time:  6 hours total, including lunch and rest breaks
  • distance: 20 km.
  • start point altitude: camp west of Tsho Chena  4925m
  • endpoint campsite: Jichu Dramo 5015 m; 5060m (Jordans)
  • high pass crossing: Loju La  5115 m (my Garmin inReach); 5145m (Jordans); 5140m (Lonely Planet)
  • Maps: Bart Jordans’ Trekking In Bhutan has some useful overview maps of the many possible variations of the Snowman, as well as of other treks.
  • See here for a Google Earth view of the day’s walk. It helps to use the Google Chrome browser!
  • I used a Sony RX100 III to frame most of the images you’ll see below; a fellow trekker’s Huawei P30 captured the others. (Thanks again, O, for letting me use them!)

Previous Post: Day 18 – Chozo To Camp West of Tsho Chena Via Sintia La

Bhutan’s Snowman Trek: Day 18 – Chozo To Tsho Chena Via Sintia La

Camp west of Tsho Chena to Jichu Dramo Via Loju La

Snowman Day 19 – West of Tsho Chena to Jichu Dramo Via Loju La

We woke up to a bit of frost on the outside of the tents – and some condensation inside.  I had started to zip open the window above my head at the end of the tent to allow some ventilation.  Still, if we arrived at camp early enough in the afternoon, I’d drape my sleeping bag over the outside of the tent so it could catch some sun rays and dry out a bit.

early morning frost on our tent at our west-of-Tsho Chena camp

Tsho Chena Camp – our horses waiting for their day’s assignments

By the time we left camp at around 8:30, the moisture on the tent had already evaporated. The tent crew got to pack away tents that were not wet. In the image below you can see a large canvas sack in front of each trekker’s tent. Inside was the stuff that had been inside each tent:

  1. the trekker’s duffel bag – about 15 kg.
  2. a 1m x 2m wool carpet
  3. a Thermarest Basecamp sleeping pad
  4.  a pillow

I had initially declined the pillow and the carpet; it just seemed a bit over-the-top to me, thanks to forty years of spartan canoe trips where the motto is always “Less is better!”

Well, I got over it after a few days when I realized that those items were still part of the baggage being carried every day so I might as well make use of them. I’m glad I did!  Given the ten hours a day you spend in your tent, a comfortable space to crawl into at the end of each day is reassuring!

[Note: The Bhutanese agency, Yangphel Aventure Travel in Thimphu, organized our trek on behalf of World Expeditions, the Australian adventure travel company through which I actually booked my trip.  Not all agencies will necessarily provide the quality equipment that Yangphel did, from a three-person Marmot 4-season  tent for each of us to the items mentioned above.  As well, we were each loaned an excellent Marmot sleeping bag and, if requested, warm parkas.

One Canadian trekking group of four I talked to had booked directly with a Thimphu company; they had two A-frame tents, with two per tent. It was crowded in there! Understanding exactly what gear – tent, bag, sleeping pad, etc. – that the agency will provide is essential before you set off.]

takedown of our camp near Tsho Chena

The day’s walk was an easy one in which we neither gained nor lost much altitude. There was a gradual elevation gain of about 200 meters over two-and-a-half hours from the campsite to Loju La. Along the way, we passed by a number of glacial lakes and puddles; current satellite imagery has many of them in a frozen state.

Also noteworthy is the shrinking size of these lakes. Looking at trip reports from a few years ago often show lakes that are noticeably larger in size. Given how shallow these “lakes” are, perhaps it does not take much to cause such a change. I wonder if there will be any lakes – or snow-covered peaks – in this stretch of the Snowman in twenty years.

two shallow glacial lakes just below our Day 18 Campsite

The photo below was taken from a scenic lookout at 5100 meters we came to about an hour into the walk.  Looking back I could still see some of our orange tents were up.

looking back at the first hour of the day’s walk – enlarge to see our previous day’s campsite

a glacial lake before Loju La – it could be Tsho Chena

We got to Loju La pass just before 11, 2.5 hours after setting off. We relaxed for a while and enjoyed the views and the feel of the sun.  We waited long enough that the lunch team – Karma and Kinley and a horse handler, as well as three horses carrying all the food and gear – came up to the pass and continued on down the other side.

laptse (pile of stones) and prayer flags at Loju La – Day 19 of the Snowman trek

Angel ‘s photo – our lunch team crossing Loju La on Day 19 of the Snowman Trek

the glacial puddle below Loju La on the south side

We would soon follow them down.  One of my fellow trekkers took the shot below of that glacial lake I had framed from on top of the pass. Nicely captured is the clarity of the water.  I do wonder if that puddle is even a half-meter deep!

glacial puddle on the south side of Loju La

Lunch came shortly afterwards and, as you can see from the image a couple down, it was the usual deluxe affair, complete with table cloths! Note the Helinox chairs provided – they represent a major investment for the agency!

lunch below Loju La – Bhutan trekking style

scenic view on the south side of Loju La on the Snowman Trek in Bhutan

a close up of the dominant peak in the above stretch of rock

After lunch, it was less than two hours to our campsite over fairly flat terrain.  I must have gone into a walking trance because I took no more photos this day, not even of our campsite at Jichu La as we arrived!  At 5015m, we were about 100 meters higher than at the start of the day.

Luckily, the next morning would provide some dramatic campsite images!

Next Post: Day 20 – Jichu Dramo To Tsho Tsho Tshang Via Rinchen Zoe La

some stunning shots from Rinchen Zoe La…the Snowman’s highest pass

Bhutan’s Snowman Trek: Day 20 – Jichu Dramo To Tsho Tsho Tshampa Via Rinchen Zoe la


a yak team crossing Rinchen Zoe La at 5325 m – the highest pass of the Snowman trek


Posted in Bhutan, hiking/trekking | Tagged , , , , | Leave a comment