Last update: March 25, 2023.
Table Of Contents:
The VIA Sudbury to White River Train
Can the upper river (i.e. south of Little Missinaibi Lake) be done?
What are the obstacles? How many portages are there?
Is it a viable alternative to the Bolkow route?
Links To Some Related Web pages (outposts; Bill Steer article)
—————–
Introduction with Overview Map
Flowing 65 kilometres from its headwaters in Sunset Lake to its mouth at Whitefish Bay in Missinaibi Lake, the Little Missinaibi is not a long river. A little past its halfway point, it widens out with shallow bays that reach in all directions. The result – Little Missinaibi Lake, a renowned fishing (northern pike and pickerel) destination served by a couple of fly-in outposts on islands at the north end of the lake and another on Cam Lake, one lake over.

The river – and the lake – are within the 7000 square kilometre Chapeau Crown Game Preserve, which is the world’s single largest animal sanctuary since no hunting or trapping is allowed. This put an end to the traditional economy of the Indigenous families who lived there. The potential for wildlife sightings, especially of moose and bear, is said to be high. Logging, however, continues to this day.
—————–
Missinaibi As An Anishinaabe Territory
 In 1905, Treaty No. 9 was signed by representatives of Canada’s Federal Government and by leaders of the various Indigenous (Cree or Ojibwe) communities, made up of Anishinaabe Peoples who speak one of the Algonkian languages. The area covered by the Treaty was the land on the James Bay side of the Height of Land with the Albany River as the northern limit.
The map below shows the southern part of the Treaty No. 9 territory with the Missinaibi area in the circle.

Treaty no 9 close-up – see here to access the full map
(Click here for a map showing the current locations of the area’s various First Nations communities, the total population of which is currently about three hundred.)
While those living on the north side of the height of land (for example, on Lake Missinaibi) would now receive the same $4 a year settlement as those living on Dog Lake and covered since 1850 by the Robinson-Superior Treaty, there would soon be more than the Treaty to deal with.
In the mid-1920s, the Chapleau Crown Game Preserve (see the first map) was established, and those families living within the Preserve’s boundaries (specifically the Brunswick House band at the north end of Missinaibi Lake) were removed to/resettled in the Chapleau area. The number of people affected is not stated.
Despite the earlier Treaty No. 9 terms, no exception to the hunting ban within the Game Preserve was made for these members of the Indigenous communities in the Chapleau area. This CBC article examines some of the issues this has raised recently.
—–

A comprehensive account of Treaty No. 9 is currently on my night table and may eventually lead to a more detailed look at the Treaty in this section.
. If you are curious, click on the cover image to the left or on the title below. It will take you to the Amazon website.
A review by Wendy Russell in Anthropologia (2011) gives a clear account of the book’s content and merits. 11 copies of the book are available at the Toronto Public Library.
—–

Another source with a specific Missinaibi focus is The Dispossession of the Northern Ojibwa and Cree: The Case of the Chapleau Game Preserve by David Calverley (Ontario History, Spring 2009). The author summarises his study in the following words –
- an examination of both treaties to establish the existence of a treaty right by both bands to hunt within the territory of the Chapleau Game Preserve,
- how this right was taken from them, and
- the resulting dispossession that occurred.
Click on the header or title to access.
—————–
Missinaibi: “Place of Pictures”

close-up of the main panel at Little Missinaibi Lake Picto Site #2
Besides fishing and wildlife viewing, another major attraction is a series of pictograph sites on both Little Missinaibi Lake and Missinaibi Lake. These ochre rock paintings are hundreds of years old and are expressions of traditional Anishinaabe culture. They are the work of shamans or vision questers at sites associated with the manitous who could grant favours or medicines to those who came to ask. Many of these pictographs are badly faded and almost indecipherable; enough remains to still make the visit worthwhile. Paddling by these sites is an easy way to elevate an already excellent wilderness canoe trip to an even higher level.

a view of Little Missinaibi Lake’s “Pothole” pictograph site from the south
The very word Missinaibi has its roots in the Anishinaabe language. The earliest reference I have found to it is in a report written by Robert Bell of the Geological Survey of Canada and published in 1877. He refers to the lake and river as Missinibi. A.P. Low of the same GSC spells it Missinabi in his 1888 summary report. A government topo map from 1901 uses the same Missinaibi spelling for the village, the river, and the two lakes. These days, the village name is spelled differently than that of the river and the lakes!

See here for a copy of the entire map set.
This quote from Selwyn Dewdney, the person most responsible for initiating the study of the native pictographs of the Canadian Shield, makes clear the probable origin of the name:

The word Mazinahbikaung – or Mazinawbikong – shares its roots with another Ontario lake famous for its pictographs, Mazinaw Lake in Bon Echo Provincial Park.

another view of the core of the Pothole site
—————–
Wildfires Along The Missinaibi R. System
In the recent past, the Missinaibi area has been spared the impact of wildfires. As the map below shows, the last significant fire in the Little Missinaibi Lake vicinity was in 1995, almost thirty years ago. The central Missinaibi Lake fire dates back almost another decade.

Upper Missinaibi River – fire history since the mid-1980s
As for the rest of the river, it too has seen little recent wildfire activity. The one minor wildfire was north of Thunderhouse Falls in the James Bay Lowlands as you come to the Rabbit River/Missinaibi River confluence. It dates back to 1995.

Screenshot
Check out Natural Resources Canada’s Canadian Wildland Fire Information System website for the source of the above map and for current conditions.

The interactive map at the Ontario Government’s Ministry of Natural Resources and Forestry website is another source of current info. Access it here.
—————–
Hap Wilson’s Missinaibi Guidebook
 The last section of the river – the one from Little Lake Missinaibi on down to Whitefish Bay and Missinaibi Lake – is well-documented. Online trip reports and published material like Hap Wilson’s Missinaibi: Journey to the Northern Sky: From Lake Superior to James Bay by Canoe provide paddlers with useful information on rapids, portages, and campsites, as well as points of interest like scenic lookouts and the location of the pictograph sites.
What has been lacking is information on the forty-five-kilometre upper stretch of the river before it reaches Lookout Bay at the south end of Little Missinaibi Lake. We saw our canoe trip as a chance to do some reconnaissance and fill in the blanks!
—————–
Approaches To Little Missinaibi Lake & Fairy Point on Missinaibi Lake:

Overview – Missanabie to Chapleau
While we chose to get to Little Missinaibi Lake from its headwaters, you don’t need to paddle down the upper stretch of the River to access the Lake! What follows are the four options, which will get you there while providing some great paddling, classic Canadian Shield campsites, and a chance to see the pictograph sites mentioned. And, to no surprise, there are a few portages along the way!
the “back door” options –
1. from Barclay Bay;
2. from Missanabie via Dog and Crooked Lake
the “side door” option –
- 3. Bolkow Lake entry popularised by Hap Wilson’s book
the “front door” option –
- 4. from Windermere Lake’s Healey Bay into the river’s headwaters

The first two options approach Little Missinaibi Lake from the mouth of the Little Missinaibi River in Whitefish Bay and work their way up to Little Missinaibi Lake – i.e. through the back door!
—————–
Option #1 – From Barclay Bay

- distance: 12.5 km. to Whitefish Bay + 11 km. to above Admiral Falls
- time: one long day or two shorter ones
This is the most common way to get to Fairy Point on Missinaibi Lake and to Little Missinaibi Lake. After an 88-kilometre gravel road drive from Chapleau to the Barclay Bay campground of Missinaibi Provincial Park (see the first map above), you paddle up Missinaibi Lake for 12.5 kilometres to Whitefish Bay. If there is a south-west wind blowing it can get interesting!
At Whitefish Bay is the beginning of a 1000-meter portage to access the Little Missinaibi River. It may take you a day to go upriver, and you will use the Trump Lake bypass (another 1000-meter portage) to avoid some of the rapids of the Little Missinaibi from the Trump Lake portage take-out spot up to Admiral Falls.
From Trump Lake, it is a portage into and a paddle down Elbow Lake and Creek. You are now at the north end of Little Missinaibi Lake 1.5 kilometres south of Admiral Falls!
—————–
Option #2 – From Missanabie
- distance: 40 km. to Whitefish Bay + 11 km. to above Admiral Falls
- time: two long days or three shorter ones
- map – route to Whitefish Bay marked in red on the map; Trump Lake bypass in orange
Over twice the paddling distance of Option #1, it starts with 15 km of lake paddle to the east end of Dog Lake. Next is a 300-meter Height of Land Portage into Crooked Lake and another 15 kilometres down the lake to a 330-meter carry into Missinaibi Lake. If the winds are agreeable, a visit to Fairy Point on the way to Whitefish Bay is a good idea. Otherwise, you can hope that it will be calmer on your return! From Fairy Point, it is an hour’s paddle to Whitefish Bay, where you begin the up-the-Lil-Miss section described in #1.
Back to the top
—————–
Option #3 – From Bolkow Lake
- distance: about 33 km. to the mouth of Elbow Creek at the north end of Little Missinaibi Lake
- time: two long days
- map – route to the north end of Little Missinaibi Lake marked in purple on the map;
Rather than come to Little Missinaibi Lake from Whitefish Bay, this option is the side door route! Hap Wilson’s Missinaibi guidebook (1995) has a brief description and map with the basic information. The info has certainly encouraged a few canoe trippers to make the journey.
A very useful and recent (2016) trip report of the Bolkow route was posted by Paul Hudson at the Canadian Canoe Routes website.
Paul Hudson. 2016 Trip Report – Shumka to Missanabie Via the Little Missinaibi River
He and his crew dropped off their canoes and bags at Bolkow Lake, drove their vehicles to Missanabie, left them at Ernie’s Campground, and then caught that morning’s VIA train (9:00 a.m.) from Missanabie back to Bolkow and their canoes. They then paddled back to Missanabie over a seven-day period. They spent two days on the Bolkow Lake to Little Missinaibi Lake section.

All of the above options leave you at the north end of Little Missinaibi Lake at the mouth of Elbow Creek. It is 18 kilometres to the south end of the lake (13 as the crow flies), another day’s paddle during which you could visit the various pictograph sites on the lake. Then it would be another day to paddle back north for the return trip via the Trump Lake route or down the Little Missinaibi itself from Admiral Falls.
—————–
Option #4 – From Windermere Lake’s Healey Bay
- distance: about 45 km to Lookout Bay at the south end of Little Missinaibi Lake
- time: three and a half days
- map – route to the south end of Little Missinaibi Lake marked in blue on the map.
There is something special about doing a river from its headwaters to the bottom. It was the 45-kilometre upper part of it that flows from its headwaters in Mackey Lake into Lookout Bay from the south that piqued our curiosity. It would certainly simplify our trip.
Coming into Little Missinaibi Lake from the south would eliminate the need to travel its length from north to south to see the various rock painting sites and then paddle all the way back north, as is the case with the first three options outlined. With the VIA stop at Missanabie as our endpoint, it would also mean we would not need to duplicate the return paddle of Options #1 and #2.
The only problem was that there was no information we could find on the upper section of the river from its headwaters to Lookout Bay. Reading Hap Wilson’s mention of the river’s upper section in his guidebook made us look for the details. It became clear that what he had in mind was the section from Admiral Falls to the start of the Trump Lake Portage – i.e. the top part of the lower third of the river.
Back to the top
_____________________________
Accessing the Headwaters From Healey Bay
The VIA Sudbury to White River Train
We chose Healey Bay as the put-in point for our trip down the Lil’ Miss. You get there from Chapleau on the 28-kilometre Esher-Healey Road. The Happy Day Lodge is located on the bay and we tented on their property after a ten-hour drive from southern Ontario. We left our car there while we paddled to the take-out point at Missanabie on Dog Lake and on the White River- Sudbury rail line. The return from Missanabie was a breeze thanks to the 1 1/4 hour VIA train ride back to our car.
Healey Bay is also a stop ‘on request’ between the stops at Musk and Esher on the VIA rail line from White River to Sudbury. If you didn’t want to drive to Healey Bay, you could leave your vehicle at the most convenient spot on the line (e.g. White River, Missanabie, Chapleau, Sudbury) and take the train to the put-in. The VIA train service follows a regular schedule from Sudbury to White River and then returns to Sudbury the next day.

From Windermere Lake’s Healey Bay, it is a quick paddle from the lodge to the CPR tracks and the bottom of Little Island Lake. (If you are not starting from the lodge, you can request that the train let you off just before the bridge and walk the canoe down to Little Island Lake).

Here is the Federal Government 1:50000 topo view of the general area.

Fed Govt topo Healey Bay to Sunset Lake
_____________________________
And so the journey begins. Here, in brief, is what we found about the upper section of the Little Missinaibi – some FAQs if you will.
Can the upper river be done?
The short answer to this would have to be a yes! followed quickly by a but… Review the daily blog posts about our recent trip to better understand the ‘but’. This overview will help you decide if you want to do it.
Perhaps the overriding factor will be the water level. We completed the trip during mid-to-late June with the assumption that levels would be higher than later in the season. It will also govern how difficult the first roughly 40 km of travel will be.
What are the obstacles? How many portages are there?
The Healey Bay to Mackey Lake section will likely be the least affected by lower water levels. Some additional marsh walking might be necessary. Beaver dams should help provide canoeable levels similar to what we experienced. Lower levels in Mackey Lake would make the short river section between the Austin Road and the lake more challenging due to the significant deadfall. (We had to do a fair bit of branch trimming to allow us to ride/pull/push over the logs. After that section, the going should be easier.
The next obstacle is the portage into Sunset Lake. We had the good fortune of at least having a short “river” section with enough water to float/line the canoe. Lower water levels would certainly increase the carry distance. We had some blockages and rough spots after the lining part, but these would likely be ‘avoided’ by doing a longer ‘full’ portage – an extra 600m plus the 250m we did.
After a short 90m portage around a set of rapids at the north end of Sunset Lake, the progress is relatively easy to the end of Rawhide Lake. We opted to camp at the south end of Ramhill Lake by an old road crossing and continued our journey to Rawhide Lake the next day.
The tail end of our second day and most of the third day presented us with the most work. At the bottom of Rawhide Lake, we opted to do a 1.7 km portage around a section of the river that seemed rather impenetrable. (See Day 2 for pics and map). The portage ending at Key Lake Creek was made easier because after a 120-meter slog through the bush it was 1.5 km of the Woods Lake gravel Road.
Now let the fun begin! The roughly 7 km from the bottom of Key Lake to about 2 km above Mukwa Falls was one long day of deciding whether to stay on the river and canoe haul or try to find portages around the obstructions. Not necessarily difficult to do but just time-consuming. A younger crew will have an easier time dealing with the obstacles!
In places, we would empty the canoe for a short 2 m portage, reload and paddle a bit. Then it would be a bit more tree trimming to make an easier portage or trimming log/sweeper branches before hauling over and in some cases under.
Perhaps the highlight of Day 3’s eight kilometres of progress was an unexpected waterfall, which we named “Animiki” Falls for its thunderous sound. ( A closer look at the Google Earth satellite image does show some ‘white’ water.) See the Day 3 pics for a couple of shots. Of the river’s four sets of waterfalls, it ranks as the second-most spectacular. The portage is on river left, and we left it well-marked! In hindsight, we should have found a campsite nearby and spent some more time at these falls.
Is it a viable alternative to the Bolkow route?
We figure that if the stretch of the river from its headwaters had been included in Hap Wilson’s book twenty-five years ago, it would be an easier paddle these days. Successive groups of canoe trippers would have done some work on the sweepers and log jams; the portages would be a known commodity. We are hoping that this post – and the day-by-day trip report – will encourage future trippers to go down a forgotten but totally doable river.

Whitefish Falls – the emphatic endpoint of the Little Missinaibi River
Back To The Top
_____________________________
On-Line Map Sources:
1. Federal Government 1:50,000 Topographic Maps
Natural Resources Canada, a ministry of the Canadian Federal Government in Ottawa, provides free access to all government-produced topographical maps, both 1:250,000 and the more useful 1:50,000.

While some of them date back to the 1970s, they are nevertheless a valuable resource for canoe trippers. See here for the folder which contains all of the Topo Canada map material. Choose either the 50 k pdf or tif folders and then find the maps using the numbers and letters below.
Or – just click on the following map titles for the ones you will need for the Little Missinaibi River trip.
———————
2. David Crawshay’s Topo Maps Canada IOS App
 David Crawshay‘s free Topo Maps Canada app works on your iPhone or iPad to let you view the topos you have downloaded. Since we both had our Garmin GPS units and the installed Canada Topo 4.0 map set, the Crawshay app and the relevant maps came along just in case. If you don’t have a GPS unit, your smartphone with its GPS capability would do the job as an occasional check on location. We still travel with a paper map set in a waterproof holder.
——————–
3. ATLOGIS Canada Topos for Android OS: free/$14.
There is an Android OS app from a German app developer similar to Crawshay’s Topo Canada iOS app. However, it costs $14. U.S. Given its usefulness, the one-time cost is a worthwhile investment that will save you time and aggravation. Click here to access the Google App Store page –

Note: The free version of the app may be enough for your purpose.
4. Natural Resources Canada’s Toporama

The Atlas Of Canada’s Toporama website
—————
5. Google Earth and Ontario’s MNR Satellite Imagery

Google Earth is definitely worth a look. The satellite images are more recent than the topos and capture details not shown on the government maps. You can now open up Google Earth directly in the Chrome or Safari browser. [Before, you had to install a dedicated Google Earth app to access the imagery.]

The Ontario Ministry of Natural Resources and Forestry’s “Make a Topographic Map” website is useful. I often take a look at its satellite imagery since it seems to be different than Google’s and is often more revealing.
Back to the top
_____________________________
Two Outposts On Little Missinaibi Lake
Little Missinaibi Lake has a couple of fishing outposts, each located on an island at the north end of the lake. The Outpost Camps Inc website has a map of the lake with points of interest. See here. The other outpost is owned and run by Hawk Air Fly-In Vacations.
Bill Steer’s article on the Pictograph Site
Bill Steer (aka Backroads Bill) has a nice write-up on the pictographs at Fairy Point on Missinaibi Lake and includes GPS coordinates and details on how to get there. Check it out at The Rock Fairies – Spiritual Pictograph Site.
_____________________________
The Day-By-Day Posts –
Windermere Lake’s Healey Bay to Missanabie
The following posts provide details – maps, photos, and discussion – of the 120-kilometre trip from Healey Bay to Missanabie. We had two main goals –
- to paddle the entire length of the Little Missinaibi River;
- to see the seven pictograph sites (4 on Little Missinaibi Lake and 3 on Missinaibi Lake)
We got it done and had a great time doing it, even if Day Two’s “incident” weighed heavily on our minds.
_____________________________
back to the top
Canoeing The Little Missinaibi River: Day 1 – from Healey Bay to Ramhill Lake


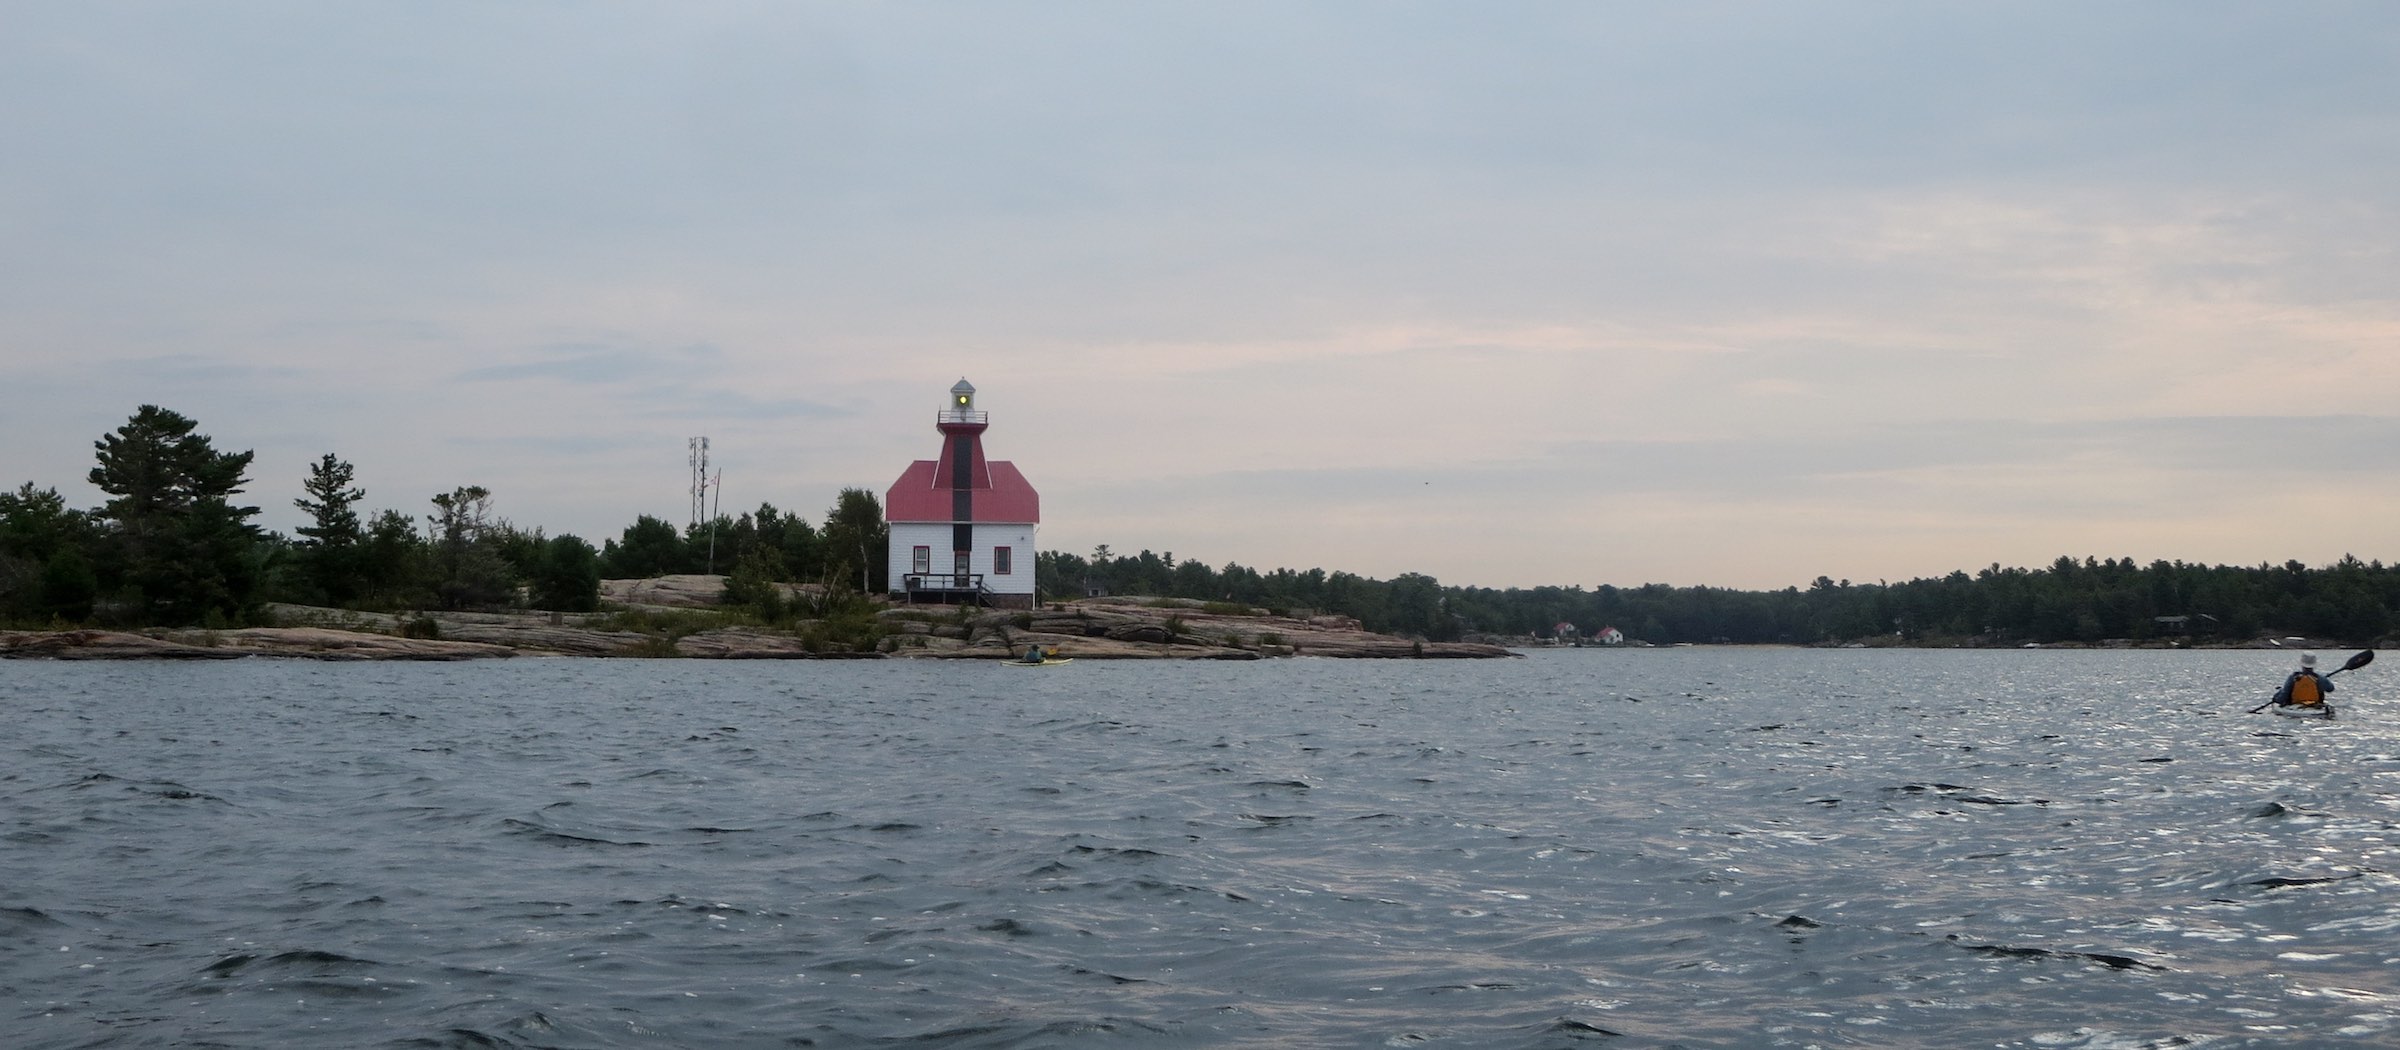
 The good weather would continue and we got to spend the day without a worry. Paddling around the south end of the Bustards and towards the Bustard Rocks lighthouses? No problem!


 The lichen-covered concrete foundation just north of the main light tower once had the keeper’s hut sitting on it. When the lights were automated in 1951, the keeper left and the hut deteriorated badly until it was finally demolished in the mid-1960s.


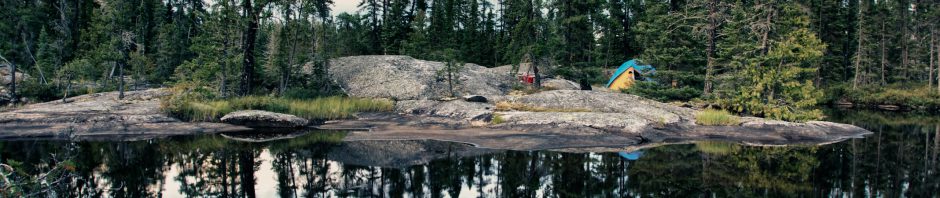
 In the photo below it is just a bit past noon and the tents were up; we had resisted the siren call of Snug Harbour!


 We stopped at the Lighthouse for lunch, getting comfortable on the west side of the main lighthouse. What wind there was coming from the east/southeast.


 When we said we were looking for Ernie one of them said we’d found him! Introducing himself as Ken Martel, Ernie’s son, he assumed correctly that we were looking for a tent site and within a minute we were walking towards an area thirty meters away that he had pointed at. He told us to come back later and pay – it was $20. (tax included) for the night. We left thinking – “Man, that was easy!”


