Bago’s Hintha Gon and the “New” Kanbawzathadi Palace

Previous Post: Bago’s Shwemawdaw Pagoda – Myanmar’s Tallest Stupa

looking back at Shwemawdaw from Hintha Gon

looking back at Shwemawdaw Pagoda from Hintha Gon

from Shwemawdaw to Hintha Gon and KanBawZaThadi

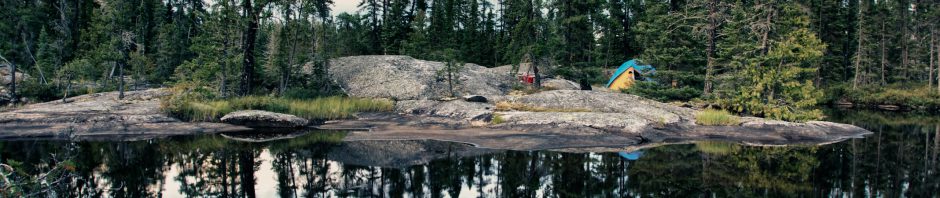
from Shwemawdaw to Hintha Gon and KanBawZaThadi – all close together

It is a short walk from the east entrance to the Shwemawdaw to the Hintha Gon temple built on a nearby hilltop – though I hopped into the air-conditioned taxi waiting for me at the west side parking lot!  The hill figures in the foundation myth of a Mon port on the banks of the Bago River in the early 800’s C.E. To them it was the city of the hamsa, the mythic bird known as hintha in Bamar.  (The word gon means “hill”.)  Here is how the current 2015 Rough Guide To Myanmar tells the story –

According to Buddhist legend, the newly enlightened Siddhartha Gautama made a flying trip to Lower Burma, which at that time was covered by sea water. Seeing a female hamsa sitting on the back of a male, perched on a tiny island of dry land, Buddha foretold that this spot would become the centre of a prosperous kingdom 1500 years later. Roughly on schedule, the waters having receded, two Mon princes founded the town, known as Hanthawaddy to the Mon, in 825 AD. The double hamsa motif can be seen all over Bago today.

Given that Bago is about a mere 18 meters above sea level it is possible that the legend echoes faint memories of a severe flood which affected the area before the ninth century foundation of the city. To connect one’s city or stupa with the Buddha’s life in some way can never be a bad thing in Myanmar!

Welcome To Hintha Gon Patho

Welcome To Hintha Gon Pahto

The temple on the hilltop was restored in the early 20th century on the inspiration – and money collecting –  of the Buddhist monk U Khanti, who is also credited with restoring the various temples on the top of Mandalay Hill. Since that time the earthquakes of 1917 and 1930 that levelled the stupa down below undoubtedly had the same effect on the structures of Hintha Gon, whose large central shrine is covered with a column-supported and modern-looking roof steel girders and aluminum sheeting.

the two hamsa - Bago's foundation myth

the two hamsa –  the key figures in  Bago’s foundation myth

As the pix above and below show,  the hamsa image is a recurring one!

Hintha Gon's central shrine

Hintha Gon’s central shrine area

monk making devotions at Hintha Gon Pahto

monk making devotions at Hintha Gon Pahto

monk at Hintha Gon shrine

monk at Hintha Gon shrine

There really is not a lot to see here other than the central shrine.  Some guide-books refer to the temple as a major nat worship site but, given my lack of knowledge about this dimension of Myanmar religion, I did not recognize much of it as I wandered around.

I did note the above seated Buddha figure in the Have No Fear pose, a nice change from the usual. The right-hand holds a bowl, perhaps symbolizing the Medicine Bowl containing the Dhamma (the Buddha’s teachings).  And then it was back to the more typical Touching the Earth mudra of most Myanmar seated Buddha statues…

Buddha figures in usual Touching The Earth mudra at Hintha Gon Temple

Buddha figures in the usual “Touching The Earth” mudra at Bago’s Hintha Gon Temple

Buddha figures in a niche of the Hintha Gon shrine surrounded by colourful lights

Buddha figures in a niche of the Hintha Gon shrine surrounded by colourful lights

I am hard pressed to explain the significance of the figures in the two following images. If the shrine is one of the eight planetary posts common in other Myanmar temples, the mouse may be associated with one of the days of the week (Thursday). However, I did not see the elaborate shrines associated with the eight days as I made my way around so it probably is a reference to some other legend.

what is a mouse doing on the Hintha Gon shrine table?

what is a mouse doing on the Hintha Gon shrine table?

The figure below I take to be a nat figure.  Nat worship is an important element of the animistic religion of the Bamars before they took on Theravada Buddhism some thousand years ago.  As in Tibet with the Bon religion, many of the Bamars’ pre-Buddhist beliefs were integrated with their new religion.

The result is a head-scratching experience for someone like me whose Buddhism is essentially a demythologized and heavily secularized version of what real Buddhists in Asia actually practise.

The nat pantheon consists of thirty-seven established major nats and a myriad of other minor nature spirits. My research into the various nats did not turn up anyone depicted in the way the figure below is.  Please comment below if you know!

a Nat figure at Hintha Gon in Bago

a Nat figure at Hintha Gon in Bago

The biggest reason for visiting Hintha Gon, other than to stand at the mythic foundation spot of what for a short while was an important city, is to see the view of the modern city to the west.  Standing above all else is the Shwemawdaw, visible in the photo below on a hazy weekday morning.

the Shwemawdaw zedi to the west from Hintha Gon

the Shwemawdaw zedi to the west from Hintha Gon

I returned to the car and my driver Wan after passing by vendors’ stalls with temple flower offerings and other items for sale.  The red and white banners depict the animals associated with the eight days of the week in Bamar astrology – Sunday’s Garuda and then the tiger, lion, tusk elephant, dragon, tuskless elephant, mouse, and guinea pig.

Also hanging there were a few multi-coloured Buddhist flags with a pattern created in the 1880’s by Henry SteelAlcott off the Theosophical Society and since adopted by Asian Buddhists as one of their symbols.

flowers and other items for sale outside of Hithsa Gon Paya

flowers and other items for sale outside of Hithsa Gon Paya

Perhaps you know the significance of the horse-like creature below? If so, let me know. There must be a reason why they would be in a shop attached to the Hintha Gon temple!

paper mache animal figures for sale outside of Hintha Gon Paya

paper mache animal figures for sale outside of Hintha Gon Paya

Ask and you shall receive!  Reader Keziah Wallis wrote back with this explanation:

Hi, the papier mache animals are actually buffalo, while they are sold as children’s toys, they are also representative of the Buffalo Mother nat Nan Karine Medaw. There is a fairly significant shrine to her at Hintha Gon Pagoda.

Ten minutes later Wan and I were approaching the building pictured below –  Kanbawzathadi Palace.  Already there were a couple of busloads of tourists – Thai and Chinese.  We had all come to see the Audience hall constructed for the most successful ruler of the Toungoo Dynasty. [He ruled from 1551 to 1581 and had made Bago (akaPegu) his new capital.]

Kanbawzathadi Palace

Kanbawzathadi Palace

Bayinnaung and the Palace - a Fifty year history

Bayinnaung and the Palace – a Fifty year history

site plan of the once-Hanthawaddy City

site plan of the once-Hanthawaddy City

The above information boards give the visitor with a bit of back ground to the rule of Bayinnaung and the site plan for the city of Hamsawaddi Pegu. The Palace itself is in a U shape with two long wings and the central area with the Lion Throne Hall. One of the wings is depicted in the image below. It is important to note that the palace you see is a construction that went up in the 1990′ based on the evidence uncovered by archaeological work. The remains of the original wooden posts were the main element uncovered.  While the recreated palace does raise questions about authenticity and accuracy, it is now another site on Bago’s tourist tour route!

a wing of the reconstructed palace complex with original posts

a wing of the reconstructed palace complex with original posts on display

explanation of posts and their history and significance

explanation of posts and their history and significance

foundation posts on display at Kanbawzathadi Palace

foundation posts on display in a wing of  Kanbawzathadi Palace

another view of the excavated posts on display at Kanbawzathadi Palace in Bago

another view of the excavated posts on display at Kanbawzathadi Palace in Bago

The ruler who commissioned the building of the palace is the middle of the three figures pictured below.  On our left is Anawrahta, the founder of the first great Bamar Kingdom after 1044 C.E. it was centered in Bagan (aka Pagan). Alaungpaya is the third monarch; he founded the last of Burma’s great dynasties, the Konbaung, in the mid-1700’s.

What all three have in common is their consolidation of power over the area we still think of as Myanmar these days.  This may explain why the military rulers invested in the construction of this palace; faced with ethnic insurgencies around the perimeter of the country,  the building is an re-affirmation of Bamar hegemony over the Myanmar of these three lionized kings.

a celebration of Three Great Bamar Kings of the Past 1000 years

a celebration of Three Great Bamar Kings of the Past 1000 years

A wikipedia article on Bayinnaung provides an excellent summary of his life and accomplishments. (See here.)  If anything gets across the scope of his success it is a map of the lands he conquered and more or less controlled –

Map of Bayinnaung's Taungoo Empire_(1580)

Map of Bayinnaung’s Taungoo Empire_(1580)

The capital of this territory – today’s Myanmar and most of Thailand and Laos – was Pegu. It was to Pegu that emissaries would come from all corners of his empire to pay homage and seek favour. The carriage below is meant to convey some of the grandeur of those times – although it seems -like a scaled-down version of the grand vehicle described by a visiting European in 1567.

a replica carriage perhaps like the one used by Bayinnaung

a replica carriage perhaps like the one used by Bayinnaung

description of Bayinnaung's carriage from 1567 C.E.

description of Bayinnaung’s carriage from 1567 C.E.

The focal point of the palace is the Lion’s throne Hall. Instead of the gold-coloured paint we see now, it is probable that real gold – and lots of it – was used to convey the might and power of the Taungoo Dynasty. Unfortunately, it was destroyed within twenty years of Baybnnaung’s death in 1581, and was only recreated in the 1990’s.

the throne room at Kanbawzathadi Palace

the front of the Lion Throne Hall  in Bayinnaung’s Kanbawzathadi Palace

There is not really a lot to see at Kanbawzathadi Palace. Perhaps in time, the available space will be used to flesh out the details of Bayinnaung’s reign and its accomplishments with more displays of artifacts from his time.  Twenty minutes was all it took to see everything.

On our way to a cup of coffee Wan did stop in front of the Bee Throne Hall; like the Palace, it is a recent reconstruction. It was apparently the King’s private quarters and contained a living area as well as his bed chamber. You really don’t get a sense of any of this as you walk around the parts accessible to public viewing.

Bee throne Hall in Bayinnaung's Palace Complex in Bago

Bee Throne Hall in Bayinnaung’s Palace Complex in Bago

inside the Bee Throne Hall at Bayinnaung's Hanthawaddy

inside the recreated Bee Throne Hall at Bayinnaung’s Palace complex in Pegu (Bago)

elaborate doorway trim at The Bee Throne Hall in Bago

elaborate doorway trim – gold-coloured paint on tin –  at The Bee Throne Hall

Over time if the motivation is there to devote scarce resources to the project as opposed to more mundane ones like new schools and hospitals and better pay for teachers and nurses, perhaps more of the palace complex will be excavated and reconstructed.

If nothing else, it sends a positive message to the young of Myanmar that their ancestors did great things – and that they can too if they work to keep the country unified.

Next Post: An Afternoon in Bago, Myanmar – Visiting The Reclining Buddhas

Posted in Myanmar | 3 Comments

Bago’s Shwemawdaw Pagoda – Myanmar’s Tallest Stupa

Related Posts: Yangon’s Shwedagon Pagoda – The Golden Heart of Myanmar

Ballooning Over The Plains Of Myanmar’s Bagan

The Uninspiring Buddhas Of Myanmar’s Bagan

monks walking on the Shwemawdaw Pagoda terracde in Bagu

monks walking on the Shwemawdaw Pagoda terrace in Bago

If you find yourself in Yangon and have spent all the time you want to in the city,  a day trip to the once-capital of a Mon kingdom in the lower Myanmar area is a worthwhile possibility.  Some seventy kilometers north of Yangon is the modern city of Bago, formerly known in English as Pegu. From 1365 to 1625 C.E., it flourished under a string of competent rulers who left impressive religious monuments.  These works not only expressed but helped strengthen their claims of spiritual legitimacy and worldly power.

The person at my hotel’s reception desk arranged for a taxi to pick me up at 7:00 a.m. For $70. U.S. I would have the service of an air-conditioned car for the day. The driver Yan had done the trip often before so he already had a checklist of sites to visit in his head and we wasted little time getting from place to place.  With another passenger or two to split the cost, the trip would have been downright cheap! It was still worth it.

Bago's Shwemawdaw Pagoda and terrace

Bago’s Shwemawdaw Pagoda and terrace

Bago’s most famous site is the great zedi or stupa pictured above. (For some reason the word pagoda – not a Burmese term – is often inaccurately used to describe it.)  At 115 meters (376 feet) it is currently the tallest in the country, reaching 14 meters (46 feet) higher than  Yangon’s Shwedagon.

The zedi which stands today was erected in the 1950’s and is the latest in a series of constructions, the first of which was built perhaps twelve hundred years ago.  Massive earthquakes over the centuries – including one in 1917 and another in 1930 – means that the structure has been rebuilt often, each time a little taller.

Satellite Photo - Bago's Shwemawdaw Pagoda and Hintha Gon

Satellite Photo – Bago’s Shwemawdaw Pagoda and Hintha Gon

Associated with the zedi are the usual relics of the Buddha – the strands of hair and a tooth or two – that infuse the structure with their perceived power.  Another important draw of the zedi is the presence of the eight planetary pillars or posts arranged around the octagonal base to which believers are drawn, depending on their day of birth or the advice of an astrologer or astrological chart. (Wednesday is divided into two days to make eight different possible days of birth).

one of the covered walkways to the Shwemawdaw terrace

one of the covered walkways to the Shwemawdaw terrace

As at Yangon’s great zedi, you enter the Shwemawtaw by one of the four long covered passageways – one at each of the cardinal directions. (See map above.) There is a almost-bazaar-like feeling in the air as you walk up towards the steps to the grand terrace on which the zedi sits.

shrine with donation boxes near entrance of Shwemawdaw Pagoda in Bago

shrine with donation boxes near the entrance of Shwemawdaw Pagoda in Bago

Once on the terrace around the zedi, there are a number of pavilions and shrines; the one above happened to be the first one I passed by after entering from the West entrance.  The Shwemawdaw terrace is more open and less cluttered than the one around Yangon’s Shwedagon.

seated Buddha statue in one of Shwemawdaw Pagoda's shrines

seated Buddha statue in one of Shwemawdaw Pagoda’s shrines

I was there at 9 a.m. so it was not yet very busy. (The time approaching dusk is a more atmospheric  time to visit, thanks to the presence of many more worshippers.) However, each of the planetary posts already had people bringing flowers and providing the Buddha figures with ritual baths.

one of the eight planetary posts around the Shwemawdaw

one of the eight planetary posts around the Shwemawdaw

another planetary post area with shrine

another planetary post area with shrine – note the water pipe behind the statue

During its heyday, Bago was a port city and ships would come up the Bago River from the sea. However, by three hundred years ago the river had changed course and the city found itself cut off from the river.  Of course, the invasion and destruction of the city  a couple of times in the past four centuries in the brutal course of war did not help matters. What still remains – admittedly touched up at times to quite some degree – are the religious monuments that still attract travellers from far away.

a reminder of Bagu's past as a sea port

a reminder of Bago’s past as a sea port

a row of seated Buddhas in the Touching the Earth position ( Bhumi-sparsha mudra)

a row of seated Buddhas in the Touching the Earth position ( Bhumi-sparsha mudra)

devotional verses on a plague at Shwemawdaw Pagoda in Bagu

devotional verses on a plague at Shwemawdaw Pagoda in Bago

I spent over an hour taking in the scene on the Shwemawtaw terrace, siting on pavilion steps and watching monks and townspeople go by.  I did not see any other “western” tourists while i was there.

Some musicians where playing in one of the pavilions so I put the audio record feature of my camera to work to capture the very mellow groove they were putting out – it reminded me of the juju sound of Nigeria’s King Sunny Ade. On a foundation of drums, the guitarist/vocalist put out a great rhythmic sound. Click on the video below and give a listen!  (My apologies for the mediocre camera work – I must learn how to shoot video one day!)

side pavilions on the Shwemawdaw pagaoda terrace

side pavilions on the Shwemawdaw zedi terrace

another shrine area with seated Buddhas and nat figures

another shrine area with seated Buddhas and nat figures

a section from the pre-1917 pagoda destroyed by an earthquake

a section of the hti (the umbrella) from the pre-1917 zedi destroyed by an earthquake

close-up of hti section from pre-1917 stupa

close-up of hti section from pre-1917 stupa

the fallen Hti and one of the eight planetary posts

the fallen Hti and another of the eight planetary posts

Devotees arrange offerings at antoerh of the planetary posts

Devotees arrange offerings at one of the planetary posts

monks walking past one of the pavilions on the Shwemawdaw terrace

monks walking past one of the pavilions on the Shwemawdaw terrace

shrine area - Buddhas under the Bodhi Tree

shrine area – Buddhas under the Bodhi Tree

Both Gaya in northern India is where the historical Siddhartha Gautama became the Buddha, the Awakened One. Sitting under the Bodhi Tree he resisted the progressive temptations of Mara, who tried his best to deflect Siddhartha from his destiny as World Saviour.  Touching the earth with his right hand to call the Earth itself as a witness, he broke Mara’s spell. That moment is depicted in the vast majority (99%?) of the seated Buddha statues you will see in Myanmar.

close-up of Buddha figure under Bodhi Tree

close-up of Buddha figure under Bodhi Tree

a Bodhi Tree with eight shrines around it - a mini planetary posts area

a Bodhi Tree with eight shrines around it – a mini planetary posts area

The above monument  incorporates Hindu Brahmanism and its astrological concerns via the planetary posts in a Buddhist framework. This is just one of the many syncretistic elements I noticed in Myanmar Buddhism.

The most significant element – and one I can make no claim to understanding – is the presence of nat images. Before the Bamars turned to Buddhism around 1000 years ago, their religion was an animist one centered on the appeasement of  nature spirits called nats. Over time a set of thirty-seven major nats and a number of minor ones developed; Mount Popa, not far from Bagan, is the major nat pilgrimage site for those in Myanmar, often country folk,  who still believe in nats.

the seated Buddha covered by the cobra head

the seated Buddha covered by the cobra head

The iconic moment in Siddhartha’s life when a cobra provided him protection from the rain while he sat in deep meditation is depicted above.  Below is what I assume is a nat figure or two; unfortunately I have yet to learn their story and what they are doing in a side shrine on the Shwemawdaw’s terrace.

two nat figures and a wooden Buddha statue

two nat figures and a wooden Buddha statue

pavilion at Shwemawdaw Pagoda - perhaps for overnighting pilgrims

pavilion at Shwemawdaw Pagoda – perhaps for over-nighting pilgrims

looking out from the above pavilion towards the stupa

looking out from the above pavilion towards the stupa

bells and sticks at Shwemawdaw pagoda

bells and mallets at Shwemawdaw pagoda

monk walks past a planetary post shrine

a monk walks past a planetary post shrine, begging bowl in one hand and fan in the other

enclosed shrine pavilion on perimeter of Shwemawdaw terrace

enclosed shrine pavilion on perimeter of Shwemawdaw terrace

the center of the above shrine room

the center of the above shrine room

another of of the 8 Shwemawdaw's plaentary post shrines

another of the 8 Shwemawdaw’s planetary post shrines

Shwemawdaw shrine being attended to

Shwemawdaw shrine being attended to

a view of the Shwemawdaw terrace from one of the pavilions

a view of the Shwemawdaw terrace from one of the pavilions

I walked around the zedi a couple of times. As is the custom in Tibet and Nepal, I did so in a clockwise direction. However, I noticed again that this is definitely not the custom in Myanmar as I saw monks and lay Buddhists walk either way.

What does seem to be important is not to expose the bottoms of your feet in the direction of the Buddha statue you have stopped to pray at.  Some of the images above will show petitioners with the soles of their feet properly placed!   I hadn’t really noticed this custom until a few days before when, on a visit to the Shwedagon in Yangon, a French tourist chastised me for being so ignorant as to be sitting the way i was!

Shwemawdaw Pagoda (Zedi) from the terrace of the Hintha Gon

Shwemawdaw Pagoda (Zedi) from the terrace of the Hintha Gon

Given all the other places to visit, it was time to move on.  After finding my driver Yan and his car, we headed to Hintha Gon for a quick visit to the hilltop shrine – and the view of Shwemawdaw that you see above.  By mid-afternoon, we had checked off anther four or five sites and in the photo below I am at the top of the Mahazedi looking back at the great stupa of Shwemawdaw one last time. It was a bit hazy but it poked up over the plains of Bago.

the Shwemawdaw Pagoda in the afternoon haze from the top of Mahazedi Paya

the Shwemawdaw Pagoda in the afternoon haze from the top of Mahazedi Paya

Next Post: Bago’s Hintha Gon and the “New” Kanbawzathadi Palace

Posted in Myanmar | Leave a comment

Pindaya’s Shwe Oo Min – The Shan Cave of The Ten Thousand Buddhas!

Having spent two days in Kalaw, we were on the move again. The town of Nyaung Shwe at the top of Inle Lake was our destination. However, before we headed there, we went to Pindaya, famous for the caves in the limestone ridge south of the town.

The attraction is the Shwe Oo Min Pagoda, which fronts an extensive maze of caves and connecting passageways. It was here that Buddhists have placed Buddha statues over the centuries. (The oldest date back about 275 years.)  While there are not quite 10,000 statues  (8091 according to one recent count, 9000 according to another), it is just a question of time before the Buddha count passes that number!

looking back to Pindaya from the Shwe Oo Min Pagado entrance

looking back to Pindaya from the Shwe Oo Min Pagoda  entrance

Some fifteen years ago, while in northern Laos, Laila and I had taken a boat some 25 kilometres up the Mekong River from Luang Prabang to see the Buddha statues in the Pak Ou Caves just above the west side banks of the river. The Buddhists of Myanmar and Laos belong to the Theravada branch of the religion. As memorable as that visit had been, the Pindaya Cave complex would contain an even more impressive collection of Buddha statues,  probably reflecting the greater agricultural wealth generated in the Pindaya area.

covered wallkway to Shwe Oo Min Pagoda entrance

covered walkway to the Shwe Oo Min Pagoda entrance

Shwe Oo Min entrance

Shwe Oo Min entrance

As you approach the pagoda and the entrance to the cave itself, you see the dramatic statues pictured above. The Prince and the Spider statues recall the legend involving the caves, the giant spider, seven princesses held captive in the caves by that spider, and finally, the noble prince Kummabhaya who kills the spider with an arrow from his bow and frees the princesses. Supposedly the name Pindaya is a condensation of “I shot the spider” in the local language!

The Prince and the Spider at the Pindaya Cave

The Prince Kummabhaya and the Spider at the Pindaya Caves

The cave lies behind the Shwe Oo Min Pagoda itself. The stupa at the front of the cave dates back about nine hundred years. Inside the cave are the innumerable Buddha figures attracting pilgrims with prayers, wishes, and offerings and tourists with their cameras and curiosity.

the final steps up to the Pindaya cave entrance

the final steps up to the Pindaya cave entrance

Getting decent photographs inside the cave proved challenging thanks to the variable light sources – a mix of tungsten and fluorescent – and sometimes just not enough light!   Some people will insist on walking around with the flashes of their cameras firing off,  annoying other people while still producing mediocre images.

My DSLR – a 2011 Sony A77 – was set at Auto White Balance and an iso of 3200, and the following pix are what I got. The tiny on-camera flash is pretty much useless – as well as inappropriate – in this situation. Sensor technology has improved somewhat over the past four years, so perhaps a newer DSLR set at 6400 will produce better images. Indeed, the cell phones that some people used were not up to capturing anything other than souvenir shots. (Not that there is anything wrong with that!)

looking back at the Pindaya Cave entrance

looking back at the Pindaya Caves entrance

The Buddhas I saw were overwhelmingly seated Buddhas in the “Touching The Earth”  (aka “The Earth Is My Witness”) mudra. This position has the Buddha’s right arm resting on his right leg with the fingers touching the ground he is sitting on. The palm of his hand is turned to the inside. Meanwhile, his left hand rests on his lap, palm up and open. It recalls the moment when Siddhartha Gautama, sitting under the Bodhi Tree at Bodh Gaya, resisted Mara’s last futile enticement. This mudra is the one that 99% of Myanmar Buddha statues are in!

a wall of seated Buddhas at Pindaya Cave

a wall of seated Buddhas at Pindaya Cave

Attached to many of the Buddha figures are plaques with the names of the donors on them. Devout Buddhists have brought the statues here – or have paid someone to do so on their behalf – to gain merit. For a Buddhist layperson, the gaining of merit – whether by offering food to members of the Sangha or by contributing to the building of a paya (stupa) as in Bagan or placing a statue in the cave here in Pindaya – is a fundamental practice.

Theravada Buddhists ultimately aim to be released from the cycle of suffering, samsara, and to achieve nirvana. To achieve success in this world—and to advance to enlightenment in subsequent rebirths—they must build positive karma, or merit.

see below for Harvard Divinity School web page

the Pindaya Buddhas - pilgrim and tourist

the Pindaya Buddhas – pilgrim and tourist perform their respective rituals

seated Buddhas wrapped in silk

seated Buddhas wrapped in silk

seated buddhas in the Touch the Earth pose

seated buddhas in the Touch the Earth pose

As in Bagan, the Buddha figures here, while exhibiting the required characteristics of a Buddha – the elongated ears, the stylized bump (ushnisha) on top of the head, etc. – are often not skillfully done. Ultimately, they are here not because of their artistic merit but because they bring merit to those who paid for them or installed them here. I reminded myself that this is not primarily an art gallery or a museum – it is, first and foremost, a living place of pilgrimage for Buddhist believers.

the Pindaya cave ceiling

the Pindaya cave ceiling – in some places, it goes up ten or fifteen  meters

the cave ceiling and the green buddhas

the cave ceiling and the green buddhas

Crawling through a narrow tunnel, I came to this small grotto and a believer deep in meditation. In front of him were a dozen different seated Buddha statues, most in the Touching The Earth mudra.

small shrine room inside a side cave at Pindaya

small shrine room inside a side cave at Pindaya

side cave buddhas - two mudras displayed

side cave buddhas – two mudras displayed

many Buddhas, all in a row

many Buddhas, all in a row

I was puzzled when I came upon the following Buddha statue. His right palm faces outward, and his index finger is curled up and seems to be holding something. I had not noticed this particular mudra in any of the other statues.

seated Buddha with medicine bowl and the dharma seed?

Seated Buddha with medicine bowl and the dharma seed?

And now there were a number of the unusual mudras all nearby. Below are a couple of other examples of the unusual hand gesture. When I returned home, further research turned up an explanation. See below for the quote that made sense of it all!

close up of aa nearby Buddha with similar mudra

close-up of a nearby Buddha with a similar mudra

yet another Pindaya Buddha with the unusual mudra

yet another Pindaya Buddha with the unusual mudra

Within the cave, there are about seventy unique images of the Bhisakkaguru tradition dating to the late 18th century. They are unique in that the styling of hair, eyes, nose, ears, robe are different from most other images from Burma.

The salient feature of this type of image is the holding of a seed in the upturned right palm. Than Tun reports that such images are found nowhere else in Burma, and based on Buddhist iconography, that these images are from the Mahayana tradition, and the conjecture is that the Pindaya cave at one time served the Mahayana Bhisakkaguru cult.

“Pindaya Caves”, Wikipedia article

another dharma seed mudra on display

another dharma seed mudra on display

two Buddhas in same mudra- bent index finger on right hand

two Buddhas in the same mudra- bent index finger on the right hand

And then it was back to the usual Touching The Earth mudra of most of the cave’s statues.

crudely sculpted Buddha figure in touching the earth mudra

crudely sculpted Buddha figure in touching the earth mudra

a few of the almost 10,000 Buddhas in the Pindaya Cave

a few of the almost 10,000 Buddhas in the Pindaya Caves

Time was running out, and I headed for the exit to rejoin the others when I came upon a passageway that led to a whole new section of the cave complex that I hadn’t even realized was there! The images below show a much less crowded and claustrophobic area of the cave; another 100 years and future generations of merit-seeking Buddhists will fill up the empty space.

passageway to another wing of the Pindaya cave

the passageway to another wing of the Pindaya cave

Pindaya cave - a new less claustrophic wing

Pindaya cave – a new less claustrophobic wing

smaller Buddha figures and their donors

more miniature Buddha figures and their donors

additional space to be filled with Buddhas in the future

additional space to be filled with Buddhas in the future

seated buddha with unusual hand gesture

seated Buddha with unusual hand gestures

cobra hoving over seated Buddha

———————

Useful Links:

The Wikipedia entry “Pindaya Caves” is an excellent overview of the topic.

The Lonely Planet website has some basic info on the caves and how to get there.

A brief article titled “Buddhism In Myanmar” in Harvard Divinity School’s Religious Literacy Project explains the significance of merit-making in Myanmar Buddhism.

Next Post: Myanmar Travels: The Road From Pindaya To Nyaung Shwe In Shan State

Posted in Myanmar | Leave a comment

A Morning Stroll Through Mandalay’s Zay Cho Market Area

Related Posts: Pindaya’s Shwe-oo-min Pagoda & The Cave of the Ten Thousand  Buddhas

Myanmar’s Inle Lake – Things To See and Do – Day One

zay-cho-market-area- mandalay Burma

Zay Cho (many other English spellings including Zegyo, Zaygyo, Zeigyo)  in the Bamar language means “cheap rice”. It is the name given to the major market in Mandalay and is one of Myanmar’s oldest.  It includes a massive covered area like Yangon’s Bogyoke Aung Sang Market,  as well as the surrounding streets (from 84th. to 86th. Streets  and between 26th and 28th) where produce and other consumable goods spill out onto the streets themselves.

stopped for traffic on one of Zay Cho's crowded streets

stopped for traffic on one of Zay Cho’s crowded streets

It can be a chaotic scene – and also one full of life.  Like market areas in other Asian cities I have visited, it provides fantastic opportunities for photographers wanting to capture a little of the colourful and dynamic upfolding of another shopping day in Mandalay. I spent over an hour walking around the open-air street market taking in the scene.

Mandalay's Zay Cho street market - somehow, order in chaos!

Mandalay’s Zay Cho street market – somehow, order in chaos!

Walk through the Zay Cho area  you will see fruits, vegetables, fish and meats, grains and legumes and so much more spilling out on the streets. Behind various baskets and stacks and full trays or tables someone – most always a female or two-  is sitting, ready to make a sale.  And nearby, if it is a street vendor, is often the motorcycle or bicycle that brought the goods or the people to their spot in the market.

Zay Cho Market - vendors wait for customers

Zay Cho Market – vendors wait for customers

fish seller and her goods

fish seller and her goods

greens for sale

scales ready to weigh the greens for sale

Zay Cho tables with bananas, bananas, bananas

Zay Cho tables with bananas, bananas, bananas

Zay Cho produce sellers sit on their mats

Zay Cho produce sellers sit on their mats

Zay Cho fish for sale

Zay Cho fish for sale

piles of meat ready to go

piles of meat ready to go

woman watching over chickens

woman watching over chickens

a traffic jam on a Zay Cho street not meant for buses!

a traffic jam on a Zay Cho street not meant for buses!

monks and tourists in the midst of a traffic jam

monks and tourists in the midst of a traffic jam

sit-down street-side restaurant in Mandalay's Zay Cho Market area

sit-down street-side restaurant in Mandalay’s Zay Cho Market area

box and trays of eggs

box and trays of eggs

dog finds some bones to chew on

dog finds some bones to chew on

another dog surveys the scene

another dog surveys the scene

yet another dog - this one without a collar

yet another dog – this one without a collar

a canal running through the Zay Cho market area

a canal running through the Zay Cho market area

fish and limes for sale at Zay Cho Market

fish and limes for sale at Zay Cho Market

woman with weigh scale

woman with weigh scale

a Zay Cho vendor contemplates the scene

a Zay Cho vendor contemplates the scene

more produce for sale at Zay Cho

more produce for sale at Zay Cho

the tomato stand at Zay Cho street market

the tomato stand at Zay Cho street market

cornering the market for peppers

cornering the market for peppers

lemons for sale at Zay Cho street market

lemons for sale at Zay Cho street market

crowded street in Cho Zay's market area

crowded street in Cho Zay’s market area

street side eatery in Zay Cho area

one of the streets on the perimeter of the market area

one of the streets on the perimeter of the market area

Click on the post title below to see more images from my three weeks in Myanmar  –

Mingalaba From Myanmar, Land of The Golden Pagodas


Posted in Easy Travelling, Myanmar | Leave a comment

Checking Out Downtown Toronto’s Street Art

It was an unusually warm and sunny November day here in Toronto. Temperatures reached 20º C  by early afternoon.  Deciding to play tourist in my own  town,  I grabbed my camera and ultra wide-angle lens and hopped on the streetcar. The first destination – the north end of Nassau Street in the Kensington Market area.  The plan was to spend the morning rambling through Kensington and then find my way to what I had only known as Rick Mercer’s alleyway in his CBC TV program The Mercer Report until a Google search turned up how to get there.  What I wanted to focus on was the street art that both areas are famous for.

Kensington Market corner - café

Kensington Market corner – café

My stroll through Kensington Market bought  back memories of the  Sixties’ counter culture of my youth. Head shops, incense shops, Tibetan and Indian handicraft stores, vegetarian restaurants…in spite of the changes, the area has kept its bohemian vibe. However, I’d be hard pressed to explain how the street art I found reflected this.

Kensington - El Diablo

Kensington area – “El Diablo”

Almost always striking are the colour combinations that the graffiti writers and painters use. Sometimes the original artists’ intent is lost in the later additions made by other taggers.

Kensington - meaning unclear and perhaps irrelevant

Kensington – meaning unclear and perhaps not a relevant concern

I had the feeling early on that the artists were working with a different vocabulary and set of cultural symbols than I was familiar with and I often had no idea what the intended message was – or even if the concept of  “message” was an approximate entry point.

black and white panel - beaver

black and white panel – beaver

Cool dude and other faces

Cool dude and other faces

As I wandered around and wondered about the meaning of what I was seeing, the Alex Garland novel The Beach came to mind.  Reading it in the late 1990’s,  I had been struck by the absence of any  allusions to the classic icons and symbols from the repository of western civilization.  In its place,  the writer draws from an image bank of video game sub-culture and tv programs like The Simpsons.

Well, I had the same experience as I stood in front of the various panels of spray-painted imagery.

Kensington laneway

Kensington laneway

graffiti in the service of commerce

graffiti in the service of commerce

“Hitched” – marriage announcement

Yours to discover

“Yours to Discover”

Red face with golden threads

Red face with golden threads

Blue lady with sunglasses

Blue Lady with sunglasses – a skilled hand with a can of spray paint

Get me Off This Planet

Get me Off This Planet!

Stuck Up Pigs

Stuck Up Pigs

another Kensington alleyway

another Kensington alleyway

A pit stop at a Nassau Street vegan restaurant and then it was over to the west side of Spadina Avenue and a walk through Toronto’s original Chinatown as it stretches from College down to Queen Street. The first lane south of Queen is Rush Lane.

Rush Lane - Queen & Spadina

Until yesterday I just knew it as the alley that the comedian Rick Mercer regularly walks down in the biting Rant segment on his Mercer Report.  Here is an example – a rant about  then-Mayor Rob Ford from November 2013 during the depths of the “crack” scandal.

Mercer comes into the alley from Queen Street and then turns east. The Garuda mask at the very beginning is still there two years later!

I came at it from the east end at Spadina and walked all the way down to Portland, where Rush Lane ends.  The first thing I saw was a large mural of which the following is only a segment. I wish I had taken more of a panorama shot of the piece; it had the look of a pirate’s treasure map and deserved more time.  The “Toronto’ tag definitely takes away from the original.

The Treasure Map

The Treasure Map” – with Toronto as the location of the cache!

I guess that’s the thing about this “art”; it is ultra ephemeral by its very nature.  Return in six months and you’d have to wonder how many of the ones I took pix of will still be there – or still be relatively unscathed by taggers.

garage and backyard passage

garage and backyard passage

Meh graffiti

Meh graffiti

a couple of cryptic statements here

Graffiti Alley – cryptic statements on the wall

My favourite panel is the one I call “I Miss Hip Hop 1993”.  It had a nice touch of whimsy and absurdist humour. You have to wonder if it wasn’t an art project by students at nearby O.C.A.D. (Ontario College of Art and Design).

I Miss Hip Hop 1993 - left side

I Miss Hip Hop 1993 – left side

I Miss Hip Hop 1993

I Miss Hip Hop 1993 – enlarge with a click

“The Flu Hating Rapper”

cat and - dog?

cat and – dog?

The Squirrel

The Groundhog

The Groundhog and surroundings

The Groundhog and surroundings

Garuda Mask in alley leading from Queen street to Rush Lane

Garuda Mask in alley leading from Queen street to Rush Lane

Portrait - Directions To Her Heart

Portrait – Directions To Her Heart

One statement on top of the other or just one?  My need to create meaning somehow fused the tagger’s graffiti to the underlying portrait of a woman and what looks to be a cityscape behind and in front of her.  I took the elaborate pattern complete with arrows pointing in various directions as a maze with one goal – that of reaching her heart.

My effort at understanding? Total b.s. of course!

The Smoking Ox

The Smoking Ox

I was struck by how seemingly apolitical almost all the works were. Fantasy and cartoon characters predominate.

Tagging Gone Mad

Tagging Gone Mad

Rasta man with spliff

Rasta man with spliff

Another one of my favourites was what I take to be Death and its all-embracing reach. it is an impressive piece that must fill a 24’x8′ space.

The Face of Death

The Face of Death

Death the All-Embracing

Death the All-Embracing

one of the hounds of hell

one of the hounds of hell

the next two pix – all part of what I called Aquarium Life – remind me of the one I started off with – the corner café in Kensington. Mind you, that one seems to be “Critters with teeth”! In each case, the mural is crammed with life.

Aquarium Life

Aquarium Life – Part I

Aquarium Life - Part II

Aquarium Life – Part II

Layer Upon Layer Upon ...

Layer Upon Layer Upon …

Blog TO website has an August  2012 post  “Ten Graffiti Writers Worth Knowing About” by someone who clearly knows the T.O. street art scene. One of the artists he mentioned is Elicser. Of his work the guest contributor writes –

ELICSER’s stylized portraits are a staple of Toronto’s downtown graffiti scene. The most prominent display of ELICSER’s skill is in and around Graffiti Alley (just South of Queen West, between Spadina and Strachan). Here, dozens of his finest pieces can be found. Alternately dark, mysterious, brooding, and beautiful, it’s hard to imagine T.O.’s graffiti scene without ELICSER’s stunning and affective portraits.

Life's Spectators

Life’s Spectators – an Elicser piece

West Coast Native

West Coast Native

Wandering the alleyways of Kensington and Queen West turned out to be a great way to while away a morning.  I saw some incredible street art,  was sometimes puzzled and sometimes taken by the various pieces I stood in front of. The ultra-wide angle lens proved to be invaluable  since all the pix were shot very wide (i.e. 15mm).

My project for the next little while is to find out more about the Toronto street art scene.  If you are interested,  I have listed a few web sites below that provide more information.

Toronto City Hall with

Toronto City Hall with the 3-D  “Toronto” Sign

On my way to the Coconut Grove roti shop on Dundas i figured I would cut across City Hall Square.  I hadn’t seen the 3-D TORONTO sign up close yet.  I like the way it turns everyone’s photos into instant post cards!   I hear Councillor Norm Kelly would like three more put up – this time with “THE 6“, “T.O.‘, AND “T.DOT” spelled out. Not sure where he is planning to have them put since City Hall Square is getting kinda crowded!

Toronto City Hall and Square

panorama – Toronto City Hall and Square – enlarge in a new window with a click

Useful links:

“Ten Graffiti Writers Worth Knowing About”.

StreetARToronto is a” City of Toronto program that aims to beautify communities across the city through street art and wall murals”.  Its Facebook page has lots of leads to city-sponsored projects and locations.

7 Cool Places To See Great Graffiti In Toronto adds five more spots to check out other than the two ramble covered.

TripAdvisor actually has reviews of Graffiti Alley!  See here for the 5/5 star ratings and comments for a tour offered by some locals who call themselves the Tour Guys !

corner resto in Kensington Market

I took this pic in early May, 2106. See the first image of this post for the way it looked six months ago. “Ephemeral” is the operative word. Low grade tagging covers over much more creative work.


Posted in Toronto | 3 Comments

Cordillera Real Trek Day 14: To Botijlaca / Return To La Paz

  • distance: 2 kilometers
  • route: file for the entire trek here (except Day 14!)

Previous Post: Day 13 – Chiar Khota To Campsite 2 Km Above Botijlaca

Cordillera Real Trek Day 13: Chiar Khota To Campsite Above Botijlaca

Day 14 - distance and elevation

Day 14 – distance and elevation

Since our shuttle vehicle was not expected at Botijlaca until about 9:30, there was little reason to be getting up at the usual 6:20 a.m.  We would get an extra hour to luxuriate in the warmth of our bags! Had it been a sunny morning it would also have been the first time the sun would have been visible as we crawled out of our tents.

A Point of Clarification –  Chakapampa or Botijlaca?

Some  trek itineraries use the name Chakapampa to indicate the end point; others use the name Botijlaca.  Both are correct. The place we ended the trek is called Chaka Pampa (literally “the flat place with a bridge”).  It was there  that the electric company built the hydroelectric plant called “Botijlaca”. Andean Summits is one of the agencies that uses the name Botijlaca in its itineraries.

By 8:45 our duffels were packed, breakfast done, and the tents were coming down for one last time.  We stood around as the duffels were put into their protective bags. It was entertaining to see the llamas loaded yet again. And then it was an easy stroll down the valley to the hydro facilities and workers’ houses at Botijlaca.  It is just off the road which would take us up the Zongo Valley and back across the Altiplano to El Alto and La Paz.

loaded llamas ready for the day's haul

loaded llamas ready for the day’s haul

inside each bag a trekker's duffel

inside each bag a trekker’s duffel

Day 14 - a 45-minute walk to Botijlaca

Day 14 – a 45-minute walk to Botijlaca

the llama version of single file!

the llama version of a single file!

llamas in reasonable order here as Botijlaca nears

llamas in reasonable order here as Botijlaca nears

our trekking party just before Botijlaca

our trekking party just before Chakapampa/Botijlaca

botijlaca-chaka pampa-satellite-shot

Botijlaca - end of the trek

Botijlaca – end of the trek

Botijlaca is a “company town” that was built to serve the workers at the hydro station. We saw few “locals” after we arrived; I saw a couple of blue-collar workers at a warehouse and two well-dressed guys with shiny new hard hats and clipboards who looked to be engineers.  Do not expect to stock up on food or other supplies at Botijlaca; there are no stores!

what a difference 1500 meters makes - the flowers of Botijlaca

what a difference 1500 meters makes – the flowers of Botijlaca

a farewell to our cook team - Lucretia and her daughter Pati

a farewell to our cook team – Lucretia and her daughter Patricia

the arrieros - the muleteers

the arrieros – the muleteers

Ray delivered a gracious thank-you speech to Lucretia and Patricia, the cook team.  They had walked the entire distance with us as well as taking care of all the food.  From 4:30 a.m. to 10 at night, they were hard at work in their cook tent. The two propane stoves were all they had to make it all happen.

Also acknowledged were the arrieros and llameros; they had taken over from another crew at Juri Khota.  Now they had to get the animals back to their village.  El Largo and his helper took all the animals – the donkeys and the llamas – and headed back up the valley we had just come down.  They would retrace their steps all the way back to the starting point.  Meanwhile, the two arrieros pictured above would catch a ride with us to El Alto.

looking up the river running through the communidad

looking up the river running through the Comunidad

the river tumbles down through Botijlaca

the river tumbles down through Botijlaca

Our mini-bus arrived shortly after we did and all of the gear was loaded on board.  The map below indicates the road (we would call it a gravel road in North America – it was not paved)  that passes by Botijlaca and eventually joins a paved road before  El Alto. (You’ll find Botijlaca to the north of Nevado Huayna Potosi.)

Cordillera Real - southern section with roads

Cordillera Real – southern section with roads

Huayna Potosi and the refugio and dam

Nevado Huayna Potosi, the Refugio Huayna Potosi, and Zongo Dam

The ride back to La Paz would provide us with some great views of Huayna Potosi. At 6088 meters it is one of the six peaks in the Cordillera Real that is 6000 + meters.  The six 6000 + peaks are as follows:

  1. Illimani  6438
  2. Jankuma 6427
  3. Illampu  6368
  4. Chearucu   6127
  5. Huayna Potosi  6088
  6. Chachakumani   6074
the Southeast face of Huayna Potosi as seen from the Refugio and the dam

The southeast face of Huayna Potosi as seen from the Refugio and the dam

A closer examination of the above photo revealed some details I did not notice at first! Visible on the original 6 MB file are three high camps above the Refugio Huayna Potosi pictured above on the edge of the dam. There is a small high camp belonging to the agency which owns the Refugio; there is the Campo Alto Rocas (5130); finally, there is the Campo Argentino (5430). Before 2006 it was just a tent site but in that year a building was put up. There is also at least one  other high camp on the other side of the mountain.

Huayna Potosi Peaks and High Camps

Huayna Potosi Peaks and High Camps – click on image to enlarge

See below for a satellite shot taken of the area in May 2014 with an additional refugio – Casa Blanca – indicated. Of those who try, some 1000 people summit the mountain each year.  It is considered the easiest of Bolivia’s 6000 meter plus peaks to do; it is not as easy as some make it out to be. An additional statistic – the success rate – would probably make that clear. Is it 30%? 40%? It certainly is a popular trip for the La Paz agencies to sell – and to misrepresent!  See this tripadvisor thread (“Climbing Huayna Potosi”) for the views of some who bought the trip.

At least a week to ten days in La Paz and maybe in the Condoriri area doing 5000 meter climbs would make it much  more likely that you would be one of those who makes it to the top of Huayna Potosi – and feels great doing while doing it!

Huayna Potosi Satellite shot May 2014

Nevado Huayna Potosi from a more southerly angle

Nevado Huayna Potosi from a more southerly angle

Leaving the Huayna Potosi massif behind us, we kept on the road towards El Alto.  On the side of the road we passed by the following miners’ gravesite near Milluni.

miners' graveyard on the side of the road near Milluni

the miners' graveyard near Milluni

the miners’ graveyard near Milluni

Three hours after leaving Botijlaca, we were approaching our hotel- the El Rey Palace –  in downtown La Paz.  Most of the UK trekkers were heading back  the very next day so they were keen to get some last-minute shopping done.  I had booked a couple of extra nights at the Hotel Rosario on Avenida Illampu in the “Gringo Ghetto” just up from the Iglesia de San Francisco. I’d head up there the next morning after saying goodbye to the Brits  departing for the airport and their flights back to London.

“So long, it’s been good to know you, but I’ve got to be movin’ along…” goes a Woody Guthrie song and it sums up the transitory nature of vacation friendships. From the emails I received in the days afterwards it sounds like most went back to deal with work that had piled up in their absence. Incentive, I guess, to start planning another vacation!

downtown La Paz El Rey Palace

downtown La Paz El Rey Palace

Next Post: Up and Down the Streets of La Paz – A Traveller’s Guide

A Traveller’s Guide To La Paz, Bolivia


Posted in hiking/trekking | Leave a comment

Cordillera Real Trek Day 13: Chiar Khota To Campsite Above Botijlaca

Previous Post: Day 12 – Juri Khota To Chiar Khota

  • time: 7:45 – 1:45 p.m.
  • distance:   12.1 kilometers
  • high point:  4995 meters
  • campsite: campesino field (3811 m) two kilometres above Botijlaca
  • route: kml file here
Day 13 - Distance and Elevation

Day 13 – 12.5 km.  and a couple of passes in the 5000 m range

Our last full day of trekking!  I don’t know why it happens but as I approach the end of an extended trip – as enjoyable as it has been – I start looking forward for it to be over. Lately in the dining tent the conversation has been all about plane connections and shopping in La Paz and it is clear that everyone is shifting their focus as we near the end. One thing I looked forward to was a real hot-water shower.  The glacial streams near our daily campsites meant clean-ups were pretty quick and perfunctory!

Before we left camp we got to watch the donkeys and llamas as they got the day’s workload. The donkeys carry much heavier loads than the llamas and accept their fate with resignation. The arrieros load them with little fuss.  The llamas are a different story.  Instead of thirty kilograms, they take ten; instead of resignation, they squirm and move about and give you that delightfully haughty look as they stare you straight in the eye.  The llamero, a guy who goes by the nickname El Largo thanks to his 1.8 meter (6 feet) frame, loads his animals along with his helper. It takes a bit longer and, unlike the donkey team, there are spare llamas who are there to relieve those with loads later in the day. Our guide tells us that llameros and llamas who have been trained to do the job are increasingly scarce in Bolivia.

Day 13 - Chiar Khota to just before Botijlaca

Day 13 – Chiar Khota to just before Botijlaca

looking down Chiar Khota from the campsite

looking down Chiar Khota from the campsite

llamas coralled fand ready for a day's work

llamas corralled and ready for a day’s work

llamas at Chiar Khota before the loading begins

llamas at Chiar Khota before the loading begins

the donkeys - the real workhorses of the trek!

the donkeys – the real workhorses of the trek!

looking back at Pico Austria above Chiar Khota

looking back at Pico Austria above Chiar Khota

We left Chiar Khota and headed directly for the pass between Aguja Negra and Nevado Jallayco. It is a 350-meter climb and before we got there we stopped for a couple of breaks. Looking back at Chiar Khota we also got a splendid last view of Pico Austria and the pass. Cloud cover still prevented a full view of the Condoriri peaks however!  Conditions would deteriorate further as the morning progressed!

the day's first pass - above Chiar Khota

catching our breath near the day’s first pass – about 350 meters above Chiar Khota

the day's two passes as seen fron the north

the day’s two passes as seen from the north

A quick little dip down into the next valley and then it was “up” to the last pass of the trek, a landmark that I’ll admit celebrating.  Looking up towards the pass, significant cloud could be seen. By the time we got to the pass, it was obvious that some bad weather was on the way. The wind had picked up and the rain was not far behind.

the view from the top of the day's first pass

the view ahead from the top of the day’s first pass above Chiar Khota

a closer view of the next - and last - pass of the trek

a closer view of the  last  pass of the trek

Huayna Potosi wrapped in cloud - our best view

Huayna Potosi wrapped in cloud – our best view

dropping down to the next valley

dropping down to the next valley

cloud and mist over the last pass

cloud and mist over the last pass

cloud and mist at the top our our last pass of the trek

cloud and mist at the top our our last pass of the trek

the path ahead -some major altitude loss to come

panorama – some major altitude loss coming up!

At the pass the wind had also picked up so we did not linger long before heading down to a more sheltered spot where we could have a quick lunch break. Then it was on the move again. We were losing major altitude as the rain picked up and at the next rest stop most put on their rain gear – the first time in the trip that it was really necessary.

I foolishly decided to hold off, however, with the rain pants and only slipped them on a half-hour later as my pants were getting wet and I was starting to  feel the chill. “Isn’t it a bit late, Peter?” someone asked. “Well, better late than never,” was my cliché reply and the rain pants did indeed stop the chill. By the time we got to the end the body heat had dried the pants.


rain for the last three hours of the trek

rain for the last three hours of the trek

above Laguna Liviñosa -

above Laguna Liviñosa – 4244 m asl

We came upon Laguna Liviñosa and I just had to get out the camera in the rain to capture the beguiling scene – the lake, the mist, the folds of the mountain slopes.  The trail would take us by the right hand side of the lake and then continue down the valley for another three kilometers.  By the time we reached the camp spot seen in the pix below we had lost yet another four hundred meters in altitude and were getting to see vegetation we hadn’t seen in a couple of weeks!


you almost expect hobbits to appear - aged buildings at our last campsite above Botijlaca

you almost expect hobbits to appear – aged buildings at our last campsite above Botijlaca

We camped on the grounds of what was once a working farm. It was now owned by someone who did not live here full time. Stone fences rimmed the perimeter and at least one building, the small one you see in the photo below (bottom right of image) was open.  Already there when we arrived were Lucretia (the cook) and her daughter and helper Patricia.  They had caught up to us before the second pass – and left us feeling humbled by their energy and long days of work and walking.  –  Now they were drying out their clothes.  Not yet there were the donkeys and llamas.

campesino compound - and our last campsite

campesino compound – and our last campsite

I found a dry spot by the fire burning in the open add-on on the shack above.  Piled to the side of the fire pit was the “firewood”, actually cow dung patties that brought back memories of the Khumbu valley above Namche Bazaar where the Sherpas make use of the yak droppings in the same way.

The journey's end - sitting next to a cow dung fire

The journey’s end – sitting next to a cow dung fire

Soon the rain had stopped and we waited for the arrival of the arrieros and llameros. I walked back up the valley a bit to get a more interesting angle from which to photograph their arrival.  To no great surprise, the donkeys were first to come down the path and they did so in their typically orderly fashion. At least, orderly until they came up to  the bridge over the small creek.They headed for the creek to the left of the bridge and scampered over.

fellow trekkers - a lull before the donkeys and llamas arrive

fellow trekkers – a lull before the donkeys and llamas arrive

the donkey train approaches our campsite

the donkey train approaches our campsite

the other half of the arriero team

one of the two muleteers


The pix above are of the Aymara couple who were the arriero team with the ten donkeys.

the donkeys make their way to the end point

the donkeys make their way to the end point

I may have waited about twenty minutes for the llameros to arrive.  There was little to look at except for the mist hanging over the valley.  Then I heard whistles and shouts and they came walking through the mist and down the path in front of me. The llamas were doing a great job of walking mostly in a line with only one or two a bit off-track!

Look up valley for the llams - no sign at all!

Look up valley for the llamas – no sign at all!

the llamas emerge from the mist - at their own pace!

the llamas emerge from the mist – at their own pace!

the llamas nearing the campsite

the llamas approach

“El Largo” – el arriero

El Largo has his llamas walking smartly as they near the end

El Largo has his llamas walking smartly as they near the end

llama taking in the scene

llama taking in the scene

llamas being relieved of their baggage

llamas being relieved of their baggage

Meanwhile, the donkeys are grazing...

Meanwhile, the donkeys are grazing…

Once last time everyone pitched in and the tents got up in good time. For one last time the duffels got emptied and the sleeping bags and Thermarests set up.  It would be a much warmer evening at 3800 meters than it had been at the typical 4500 meters or so that we had been camping at.  There would be no worries at this campsite about the water bottle being frozen on waking up the next morning!

tents up at campsite above Botijlaca

tents up at campsite above Botijlaca

This dog from a  nearby farm came to visit our campsite a little later.  Curious and a bit wary, he watched as I got the camera lens down to his level for a shot or two.

farm dog checking things out

farm dog checking things out

another shot of a new friend

the Last Supper in our dining tent

the Last Supper in our dining tent

The dining tent that night saw a few toasts to the guides (Javier and Ricardo) and to a memorable – and yes, as the English say, “brilliant” –  trek down the Cordillera Real.  Someone pulled out a large bottle of liqueur that had been in his duffel since the trek’s start and it filled more of the small plastic cups. Cheers to two weeks well-spent!

Next Post: Day 14 – To The End of The Trek At Botijlaca/Return To La Paz

Posted in hiking/trekking | 2 Comments

Cordillera Real Trek Day 12: Juri Khota To Chiar Khota

Previous Post: Day 11 – Alka Khota to Juri Khota

  • time: 7:45 – 1:45 p.m.
  • distance:  7.1 kilometers
  • high point: 5306 meters
  • campsite: Chiar Khota
  • route: kml file here; open in Google earth app
Day 12 - distance and elevation

Day 12 – distance and elevation

Note the start of the day’s walk – a stretch of fairly flat trail along the shore of Juri Khota. We would have to gain some altitude to get up to the small glacial lake above Juri Khota and then even more as we walked to the col which would be the day’s high point before we headed down to Chiar Khota. [Chiar or ch’iyara is the Aymara word for “black”.]

We were hoping the sky would be clear so we could get a good view of Condoriri and maybe even make out the supposed “condor in flight” pose created by the three peaks. We also had another potential trekking peak we could take on – Pico Austria just to the south of the col. Our guide left the potential summit up to us individually.  We would decide when we got close to the last 300-meter section to the top.

I did have the Mountain Kingdoms brochure with me and it sounded do-able.

Depending on time and conditions, it may be possible to deviate from the pass at the col and ascend Pico Austria (5,396m/17,698ft).   An easy path zigzags its way up this rocky mountain to its summit, from which the views north encompass most of the mountains you have passed on your journey to date. The path is distinct because it is often used by climbers who are looking to acclimatize before tackling the popular climbing peaks in the Condoriri group.

Transcordillera Real Day 12 - Juri Khota To Laguna Chiar Khota

Trans-Cordillera Real Day 12 – Juri Khota To Laguna Chiar Khota

The satellite image above shows our route along the west side of Juri Khota. (The first part of the marked route has us walking on water! Since the Spot Connect GPS device only records a location every ten minutes, it gives you an idea of how much distance we covered in that time period. I really should have brought my Garmin Oregon with its second-by-second tracking capability!  I didn’t because while the Spot runs for 100 hours on two AA batteries, the Oregon lasts maybe 16 hours. The much greater accuracy has a price!)

looking southwest down Juri Khota and our previous night's campsite

looking southwest down Juri Khota and our previous night’s campsite

a glacial lake above Juri Khota

the glacial lake above Juri Khota

glacial lake above Juri Khota with a view (?) of Condoriri

glacial lake above Juri Khota with a view  of some of the Condoriri Massif

panorama of the glacial lake and path above it

panorama of the glacial lake and path above it – click on the image  to enlarge

caution on an exposed stretch above the glacial lake

extra caution on an exposed stretch of trail above the glacial lake

Leaving the glacial lake behind we made our way up.  Javier, our Andean Summits guide, was taking no chances on an exposed part of the trail.  He positioned himself with a rope above the worrisome part that required some class 4 hands-on-rock. We each took our turn on the rope as we walked through and up; the half-hour we spent on this came and went with no drama!  Then it was up higher on a usually visible trail that took us towards the col.

breaktime above the glacial lake

break time above the glacial lake

Finally – decision time!  Stay down at the col and wait for the others to summit Pico Austria and return or head on up for what could be some awesome views.  In the end, except for one of us, it was all in.

(One person was feeling weak from a bout of diarrhea that had hit a few of us at some time during the trip. I had mine on the very first day of the trip; the green leaf salad I had at what seemed like a safe La Paz restaurant just before I first met the group  is my best guess as to the cause.)

Condoriri Peaks and route from Suri Khota

Condoriri Peaks and route from Juri Khota

It took us about an hour to get to the top.

looking down at the path from the col to Pico Austria

looking down from  Pico Austria at the path to the col

final stretch to Pico Austria

final stretch to Pico Austria – Javier takes a photo of his guests

Before you get to the official summit, you walk along a stretch of the ridge.  At the beginning of this stretch is the metal plaque you can see affixed to the rocks in the photo below.  I am not sure what the story is – if I got the story right,  a trekker in his mid-sixties (my age exactly!) had a heart attack near this spot.  Those who knew him or trekked with him obviously felt that the plaque was the right way to recognize him.

I wonder if this is the most appropriate way to honor him?   But then – I also wonder why the peak is named Pico Austria?  Here we are in the Aymara heartland and we have a Pico Austria?  If you know the story let me know via the comment section below!

climber's memorial (Keith Isherwood) near the top of Pico Austria

climber’s memorial (Keith Isherwood) near the top of Pico Austria

Looking south from the ridge you get an incredible view of Juri Khota and the trail you took to get up here from the previous night’s campsite.  Look around to the east and you can already see some of Chiar Khota and the next campsite.  Look straight into the Cordillera and on a clear day, you can see the heart of Condoriri, the three peaks which together are said to make up the head (the Cabeza) and the two stretched-out wings (Alas)  of the Condor. We would not be so lucky!  Cloud cover hid the Cabeza and the Ala Derecha so we never did get to see the great Condor stretched out in front of us.

view of Juri Khota from Pico Austria

view of Juri Khota from Pico Austria

a view of Chiar Khota from Pico Austria

a view of Chiar Khota from Pico Austria

a view of Cerro Jawaka behind (east of) Chiar Khota

a view of Cerro Jawaka and clouds behind (east of) Chiar Khota

Condoriri peaks from Pico Austria

Condoriri peaks from Pico Austria – web source of the image here

I’ll admit that while our guide Javier was talking about the supposed condor shape in front of us, I had no idea of what I was looking for.  It was only after I returned home and did a bit of research that it became obvious.  And now, of course, that my brain has been trained to see “condor with out-stretched wings” when I see that particular peak formation, I’ll have no problem identifying the condor on my next visit!

Codoriri - La Cabeza con las Alas

Condoriri – La Cabeza con las Alas (the condor’s head and its stretched-out wings)

our trekking team atop Pico Austria

our trekking team atop Pico Austria – with me taking the photo

the Condoriri Massif - the left wing of the Condor

the Condoriri Massif – the left wing (ala isquierda) of the Condor

prayer flags on Pico Austria in the Cordillera Real in Bolivia

Tibetan Buddhist prayer flags on Pico Austria in the Cordillera Real in Bolivia

looking south to the Altiplano and a small lake

a Pico Austria view – looking south to the Altiplano and a small lake

And then it was a quick descent back to the col and on down to our campsite of the day on the north shore of Chiar Khota.

heading back down to the col from Pico Austria

heading back down to the col from Pico Austria

the pathway down to Chiar Khota

the pathway down to Chiar Khota

the path down from the Condoriri col

the path down from the Condoriri col – the first section

The photo above shows the first section of downhill from the col to Chiar Khota. The shot below was taken when we were much further down; you can see the part of the trail shown in the above photo and the much steeper part that followed.  Down at the bottom is another cairn.

a look back at Pico Austria, the col, and the path down to Chiar Khota

a look back at Pico Austria, the col, and the path down to Chiar Khota – Tony’s photo

We had a short break when we neared the bottom of the slope and everyone reached into their bags for stuff to munch on. Watching us nearby with great interest were a couple of mountain caracaras.  We had seen them throughout our trek. These caracaras behaved as if they were used to trekkers stopping and sharing food with them.  We did not disappoint them!

caracara watching us eat lunch

caracara watching us eat lunch -and waiting for his!   – Tony’s photo

the path to Chiar Khota and our campsite

the path to Chiar Khota and our campsite

entering Ch'iara Khota camp from Pico Austria

entering Ch’iar Khota camp from Pico Austria … the shot was taken by Tony

We arrived shortly after the donkeys and llamas did; I remember getting my tent up and then crawling inside and having an immediate short nap.  I was feeling the effects of 600 meters of altitude gain and then the same amount of drop to the door of my tent.  I crawled out a bit over an hour later and went off to the dining tent for a cup of tea and some biscuits.

Next Post: Day 13 – Chiar Khota To Campsite 2 km. Above Botijlaca

Posted in hiking/trekking | 2 Comments

Cordillera Real Trek Day 11: Alka Khota To Juri Khota

Previous Post:  Day 10 – Laguna Khotia To Alka Khota

  • time: 7:45 – 1:45 … six hours
  • distance:  10 kilometers
  • high point: Paso Sistaña (5096 m)
  • campsite: Juri Khota
  • route: kml file here
Day 11 - Distance and Elevation

Day 11 – Distance and Elevation

Walking along the east shore of Alka Khota for the first hour of the day, we would then head in a more southeasterly direction to the day’s high point, Paso Sistaña at 5096 meters.  After an easy bit on a path on the slopes which led to the top of Lago Sistaña, we curled south and then east to the day’s campsite at Juri Khota.

day-11-alka-khota-to-juri-khota

looking back at our Alka Khota campsite the next morning

looking back at our Alka Khota campsite the next morning – the bottom end of the lake on the left

break time above Alka Khota

break time above Alka Khota

Alka Khota panorama

Alka Khota panorama

looking back at the Cordillera Real above Laguna Alka Khota

looking back at the Cordillera Real above Laguna Alka Khota

Cordillera Real Trek - Day 11 -

Cordillera Real Trek route – Day 11 – a satellite view from a more westerly direction

looking Southwest to the small laguna above Laguna Sistaña

looking Southwest to the small laguna above Lago Sistaña

a last look at the above laguna and Cerro Wawanaki behind it

a last look at the above laguna and Cerro Wawanaki behind it

coming up to the pass which will take us down to Juri Khota

coming up to the pass which will take us down to Juri Khota

Cerro Kuntur Phusthana (4816) - the peak behind the cairn

Cerro Kuntur Phusthana

the cairn at Paso Juri Khota

the cairn at Paso Juri Khota


Straight behind the cairn was Cerro Kuntur Phusthana (4816 m), partially hidden by the day’s clouds. However, the real “Wow”  view of the day was to the north –  Juri Khota and Cerros Janchallani and Ventariani above it. At the bottom of the Khota, we could see a structure. Our campsite would be right next to it and we would make use of one of the rooms instead of putting up our dining tent that night.

looking down on Juri Khota and our campsite

looking down on Juri Khota and our campsite

Juri Khota panorama - Ricardo takes in the grandeur

Juri Khota panorama – Ricardo takes in the grandeur

heading down to our Juri Khota campsite

heading down to our Juri Khota campsite

tents on the shore of Juri Khota

tents on the shore of Juri Khota

building at Juri Khota

the building at Juri Khota – the room on the left became our dining room for the day

preparing the net for some late afternoon trout fishing in Juri Khota

preparing the net for some late afternoon trout fishing in Juri Khota

The non-vegetarians on the trip – all except me and one other who did, however, eat fish – were to be treated the next day with some freshly-caught trout from Juri Khota.  The locals – they were from the communidad down the valley – had undoubtedly been told of our arrival and were there not only to catch the trout but also to collect the camping fee and sell the cans of beer and other beverages they had brought along.

work day done - grazing at Juri Khota

his workday is done – grazing at Juri Khota

Next Post: Day 12 – Juri Khota To Chiar Khota

Posted in hiking/trekking | Leave a comment

Cordillera Real Trek Day 10: Laguna Khotia To Alka Khota

  • time: 7:45 – 12:15 p.m.
  • distance:  8.6 kilometres
  • high point: 4784 meters
  • campsite: below Alka Khota
  • Route – kml file here
Day 10 - Distance and Elevation

Day 10 – Distance and Elevation

note: Like other Aymara words, khota has a number of different English spellings. Among others,  I’ve seen Kota, Quota, and Quta.

Previous Post: Day 9 – Rio Jayllahuaya Valley To Laguna Khotia

Cordillera Real Trek Day 9: Jaillahuaya Valley To Laguna Khotia


This would prove to be a pretty light day.  We started off with on a visible trail on the southwest mountainside above Kara Khota. About an hour into the day’s walk we headed east, gaining altitude all the while.  By 10:00 we had reached the day’s high point and were soon headed down into the Alka Khota valley. The Google satellite image below has the 2.5-kilometer route along the valley floor to the concrete building we would find near the bottom of the Alka Khota. We waited for about an hour for the donkeys to arrive and the threat of rain had everyone pitching in extra to get the tents up.

Lago Khotia to Alka Khota

Day 11 - looking back at our Khotia campsite and the Lago

Day 11 – looking back at our Khotia campsite and the Lago Khotia

looking down Kara Khota

looking down Kara Khota

looking back at Lago Khotia and the campsite

looking back at Lago Khotia and the campsite

contemplating one of the day's descents

contemplating one of the day’s descents

satellite view of the above shot - a nameles glacial puddle

satellite view of the above shot – a nameless glacial puddle

from the same spot - looking south to Sura Khota and Lago Taypi Chaka

from the same spot – looking south to Sura Khota and Lago Taypi Chaka

a lower down view from the north of the two above lakes

a lower down view from the north of the two above lakes

unfinished tourist lodge above the east banks of Sura Khota

unfinished tourist lodge above the east banks of Sura Khota

The lodge on the plateau was apparently built with international development money to help create tourism-related jobs for the local community; either the money ran out or the folly of the location only became obvious after the building started.  In any case, the building was never finished and the roof is already leaking!

We looked over at the waste of someone’s time and money and then headed down the diagonal “trail” seen in the photo below.

the hint of a trail taking us down to the valley floor

the hint of a trail taking us down to the valley floor

Here is a closer look at the sand and gravel trail we walked down.

Our guide Javier coming down the trail - Tony's photo

Our guide Javier coming down the trail – Tony’s photo

Once down on the valley floor we saw – not for the first time –  evidence of impressive campesino irrigation work. It made an interesting contrast to the “white elephant’ up on the plateau and perhaps shows that if the project relates directly to the locals and their traditional herding and farming activities they know exactly what to do and how it do it properly.

The photo below shows (inadequately!) a canal leading water off the main stream so that it can be used to irrigate more of the valley land.

irrigation canals in use in the upper valley

irrigation canals in use in the upper valley

It was overcast and threatening to rain when we got to the campsite below Alka Khota shortly after noon. Here is a shot – not mine, but Javier’s – of our lunch spot at the lake –

Alka Khota - trekkers' lunch

Alka Khota – trekkers’ lunch – Javier’s photo

I seem to be busy not with my sandwich but with my camera. In fact, I am probably working on the shot you see below.  The current generation of Sony cameras has this fantastic feature called “Panorama” which creates a stitched-together in-camera shot like the one you see below. No need even for a tripod since everything is aligned by the in-camera program.

panorama - Alka Khota and the Cordillera Real

panorama – Alka Khota and a slice of the Cordillera Real

When the donkeys arrived about an hour later their loads were quickly taken off and tents put up and gear tucked away in record time.  While it felt damp and misty for the rest of the day, it never did actually rain.

the donkeys arrive at Alka Khota

the donkeys arrive at Alka Khota

unloading the donkeys on a misty afternnon at Alka Khota

unloading the donkeys on a misty afternoon at Alka Khota

looking into the mist at the top (east end) of Alka Khota

looking into the mist at the top (east end) of Alka Khota

Next Post: Day 11 – Alka Khota To Juri Khota

Cordillera Real Trek Day 11: Alka Khota To Juri Khota

Posted in hiking/trekking | Leave a comment